Connect Vyne Sync to Your Practice Management System*
By connecting Vyne Sync, all patient emails will automatically flow into Vyne Trellis for Secure Email. Note: Vyne Sync is required to be installed on your practice server.
*If you have not already connected Vyne Sync to your Practice Management System.
Open Vyne Trellis and expand the “Practice Tools” section.
1. Select Secure Email
Compose your first message
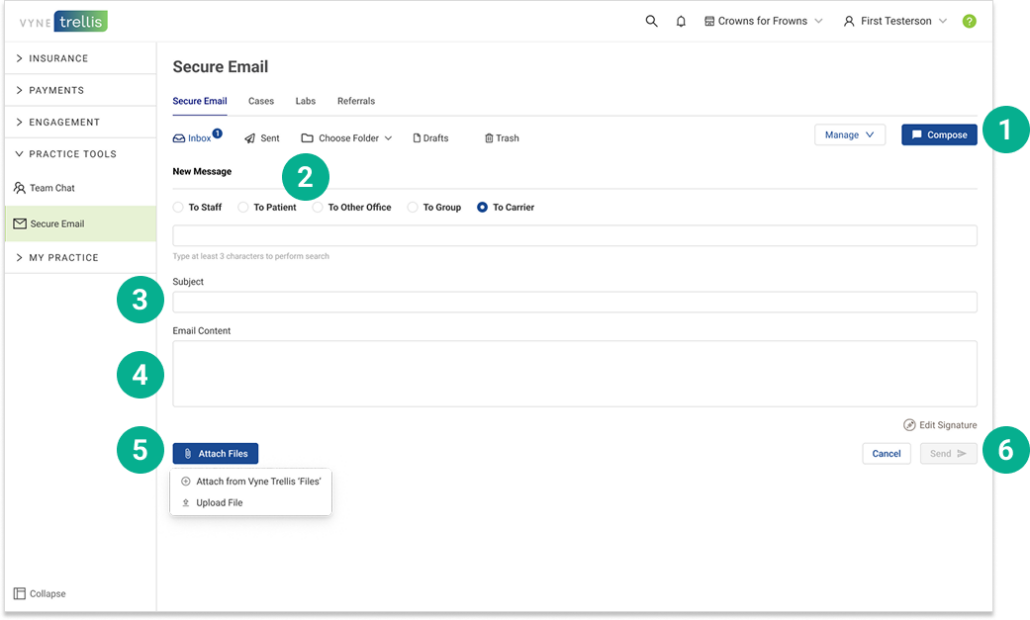
1. Click on Compose 2. Select the recipient type and enter their email address(the instructions for each recipient type are listed below). 3. Enter the subject of the email. 4. Enter your email message in the content field. 5. To add attachments, click Attach Files. You can attach any files uploaded to Vyne Trellis Files – or select any local files to upload. Note: Install the JETT File Uploader Plugin to upload files from your workstation to Vyne Trellis. 6. Once complete click the send button.
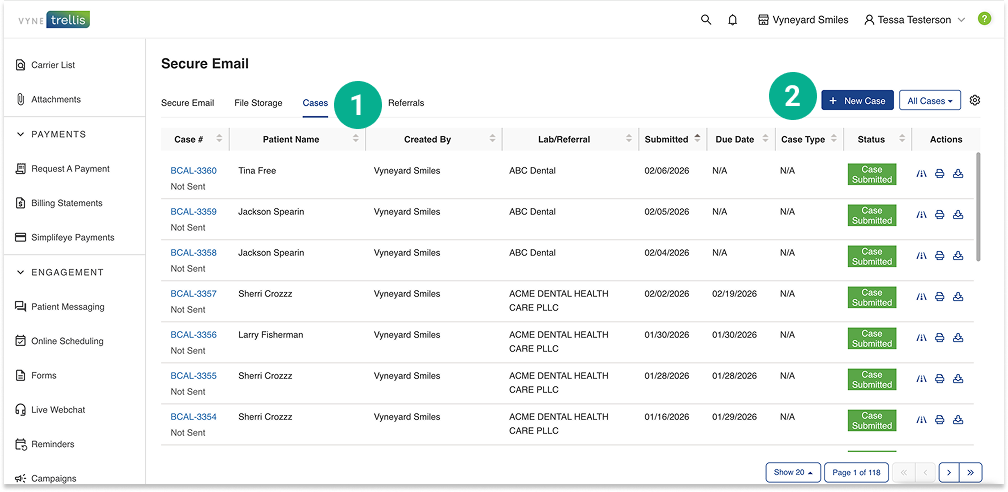
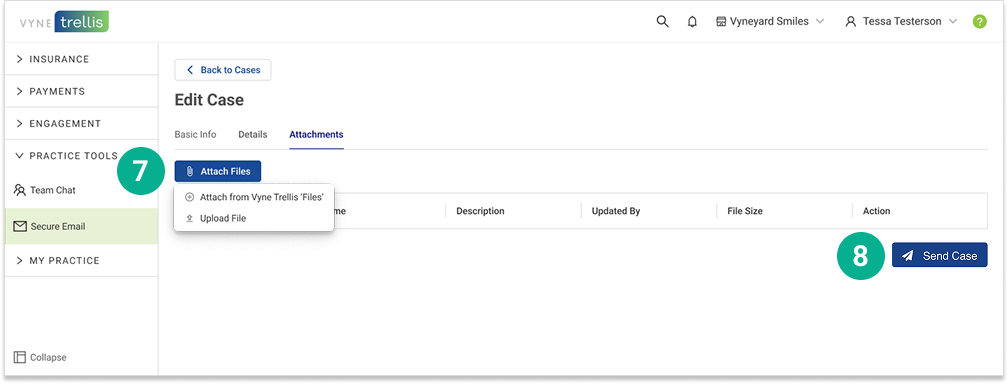
Send a Digital Case
1. Click on the Cases tab 2. Select the New Case button
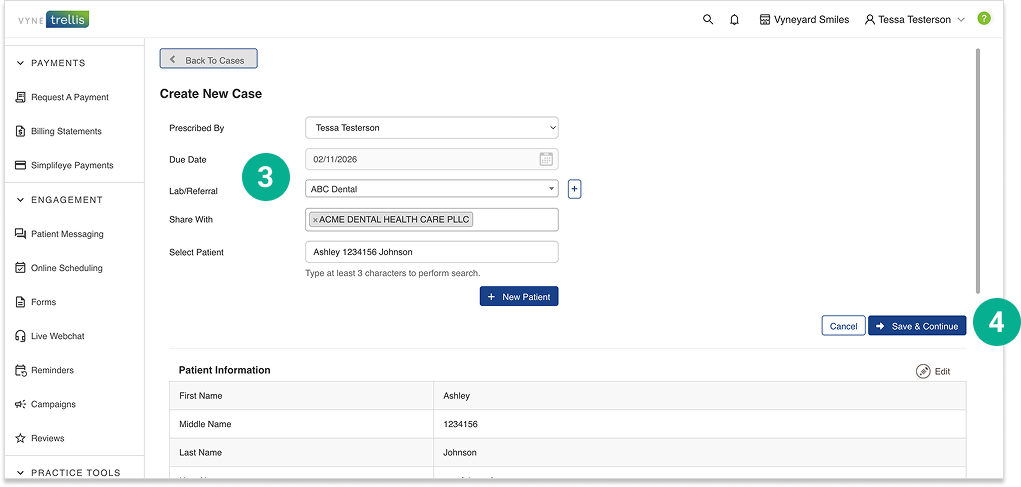
3. Fill in the appropriate fields, incuding the associated patient. You can also manually add a patient. 4. Enter your email message in the content field.
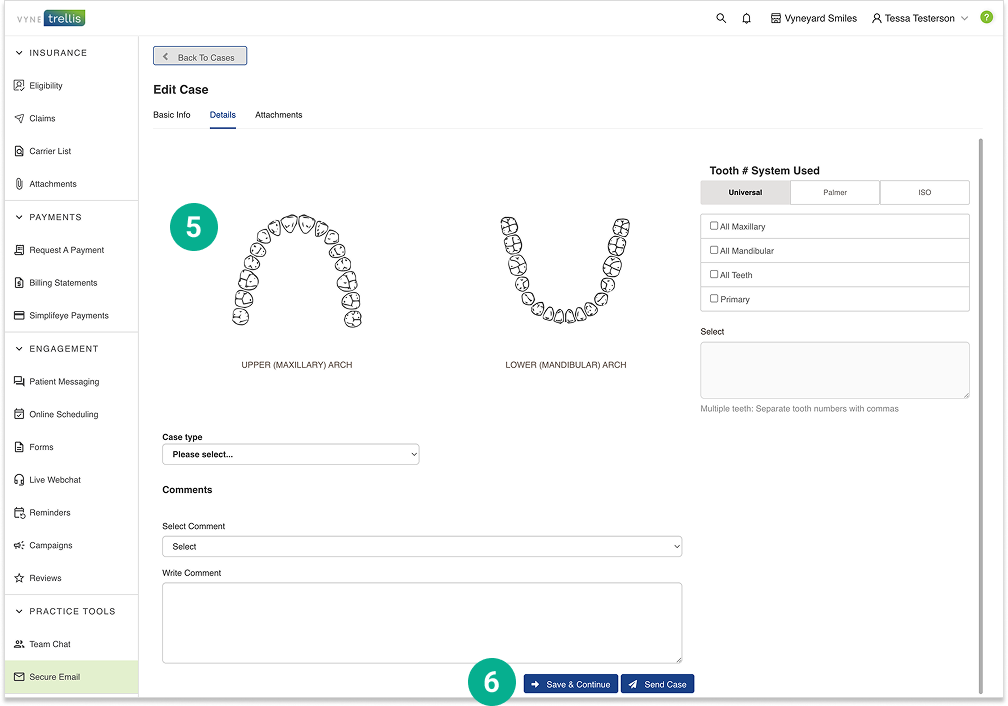
5. Enter the case details, including selection of tooth number(s), case type and comments 6. If you have attachments to add, click Save and Continue. If no attachments are needed, click Send Case.
7. To add attachments, click Attach Files. You can attach any files uploaded to Vyne Trellis Files – or select any local files to upload. 8. Once all attachments are complete, click Send Case.
If you need to manually add a patient, click here for alternative instructions.