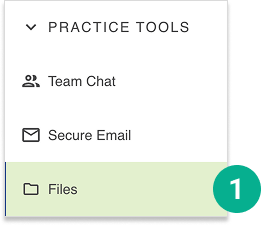
Open Vyne Trellis and expand the "Practice Tools" section
1. Select “Files”
STEP 2
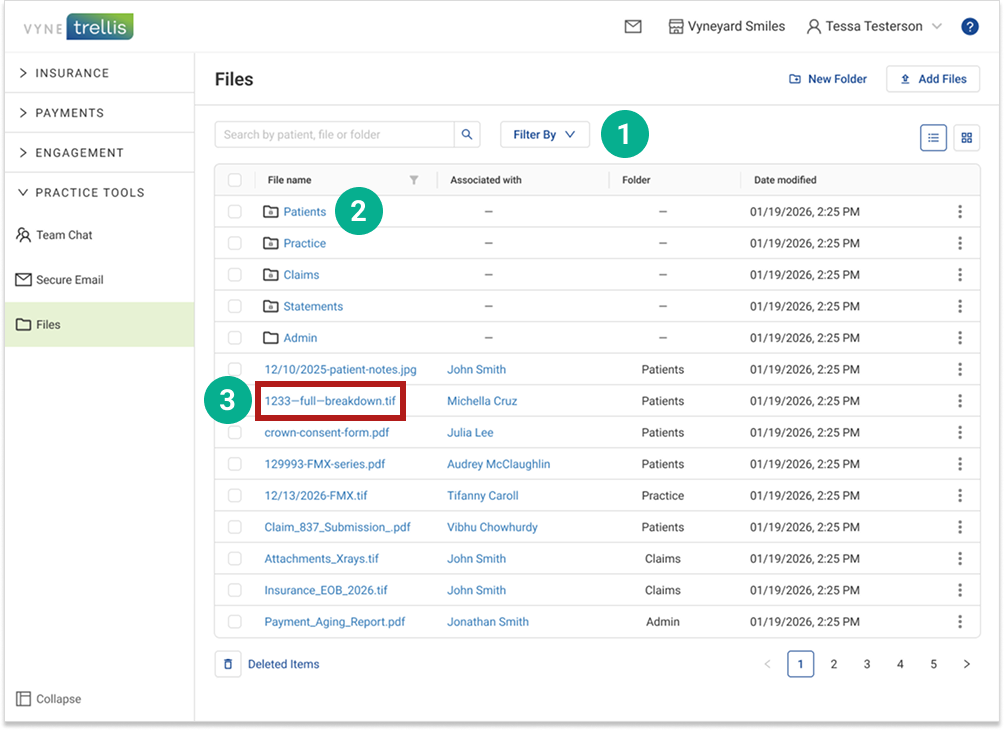
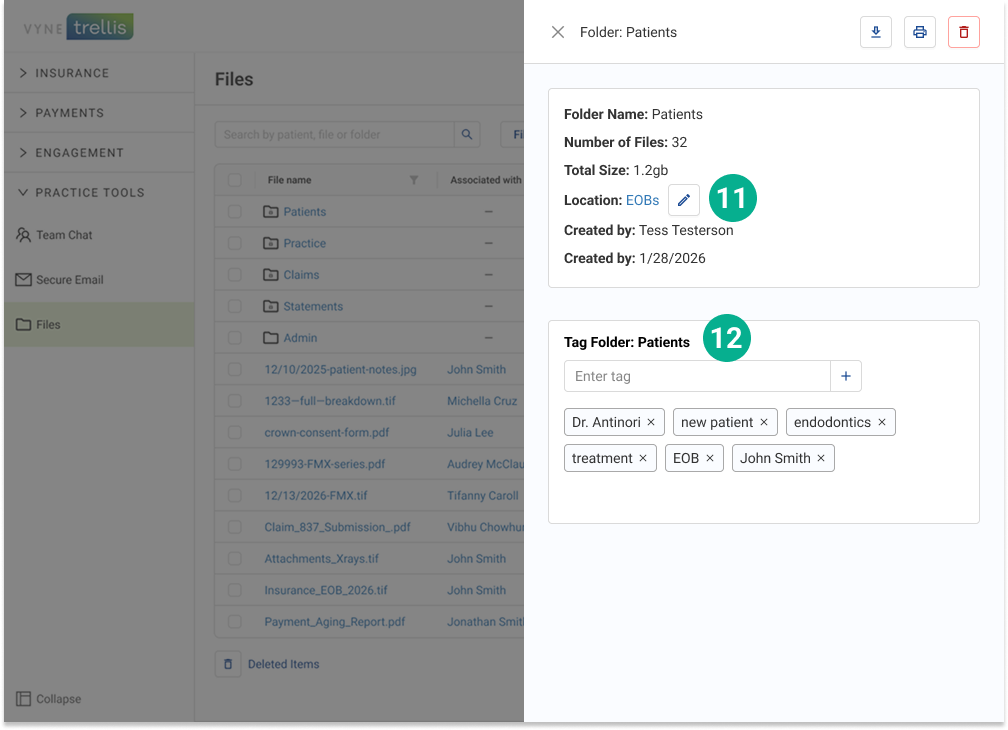
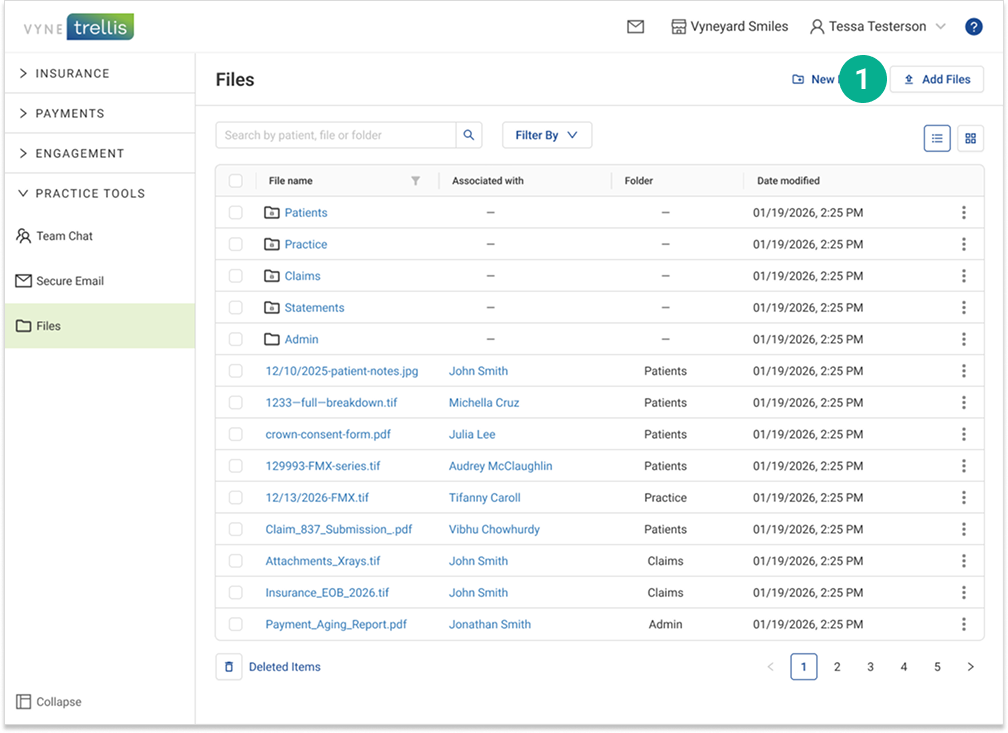
Files features
1. Filter your view to include files, folders, or all items 2. Click any folder name to view the contents of the folder 3. Click any file name for a preview of the file
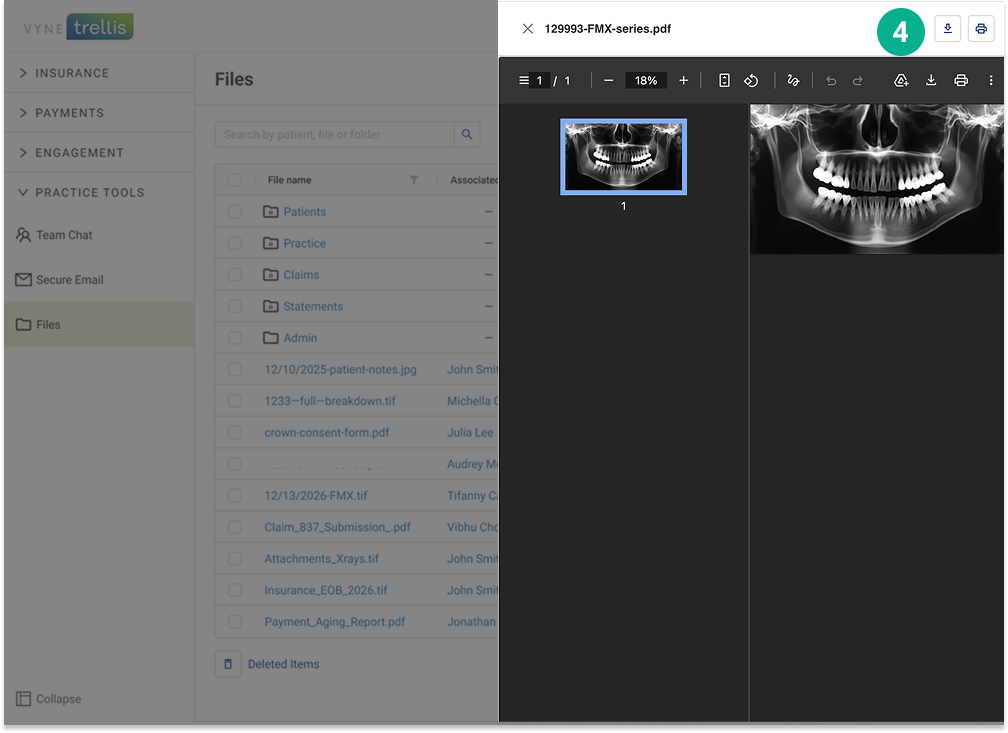
4. Once in your file preview, you can view, zoom, print, or download the file
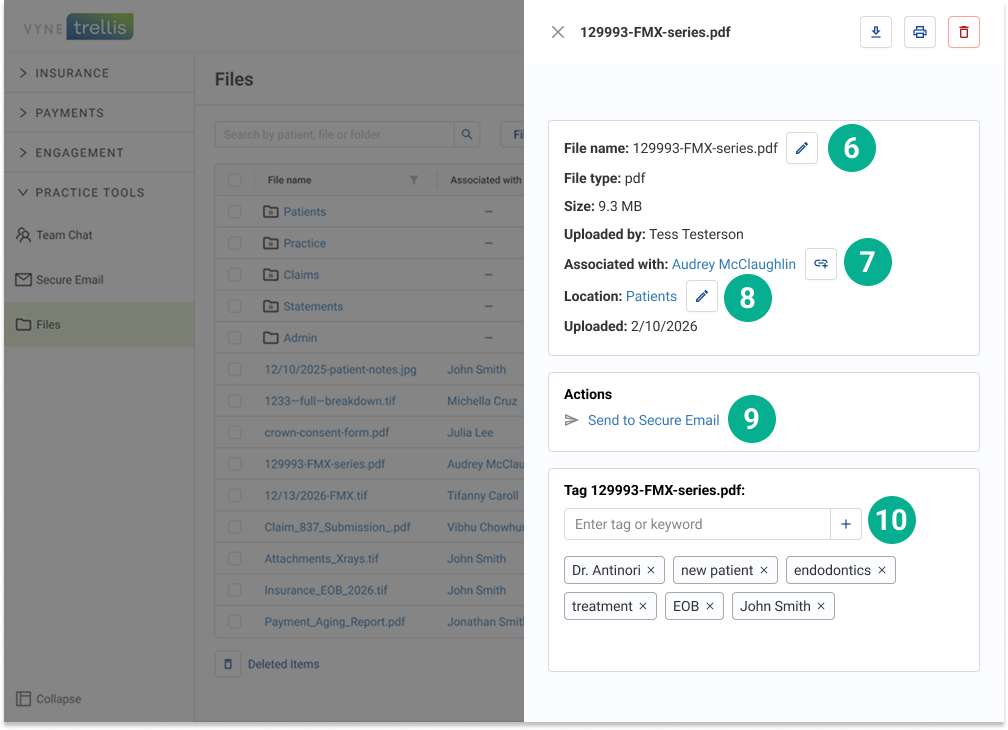
5. Click the three dot icon at the end of any file or folder to view for more detailed information
For files, you can take the following actions:
6. Edit the file name 7. View or change the patient associated with the file 8. View or change the folder the file is located 9. Directly share/send the file to other features like Secure Email 10. Add tags/keywords to the file to make search even easier
For folders, you can take the following actions:
11. If you have created a folder, you can choose move that folder anywhere within Vyne Trellis Files, including within other folders 12. Add tags/keywords to the file to make search even easier
Uploading Files from Your Practice Management System to Vyne Trellis Files Center
The JETT file uploader routes documents from your PMS directly into Vyne Trellis, enabling secure email attachments with fewer manual steps—no exports, no downloads, no local storage.
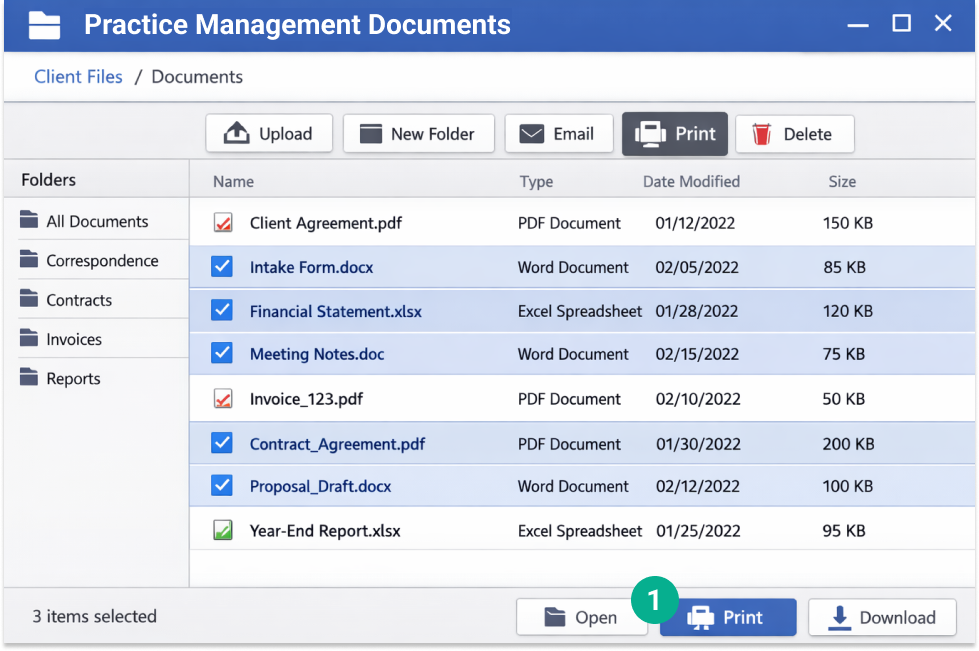
1. Select the files you’d like to send to Vyne Trellis and click Print.
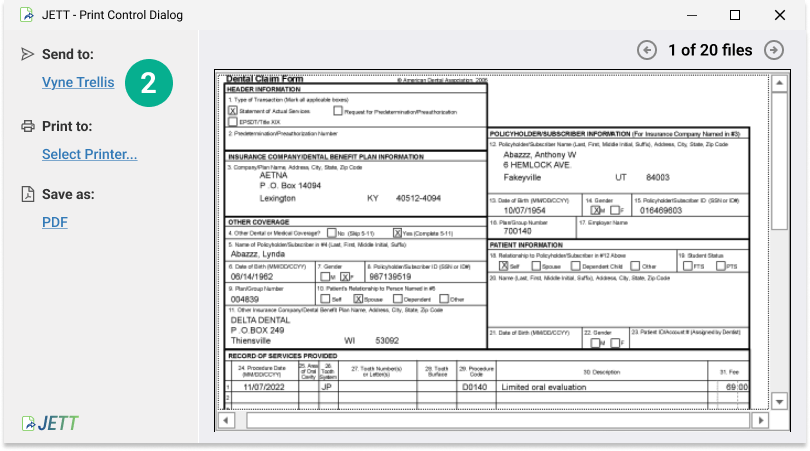
2. The JETT Print Control Dialog will launch. Click Send to: Vyne Trellis.
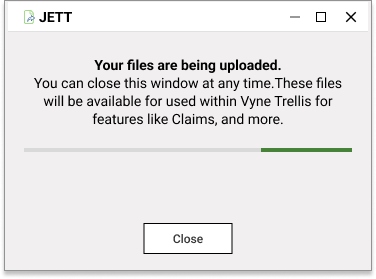
3. You’ll see a confirmation window that your files are being uploaded to Vyne Trellis.
Claims are automatically routed through the standard Claims process
Statements are automatically routed through the standard Statements process.
All other documents printed with JETT are sent to the Files tab, ready to use in Secure Email.These documents will be available in Vyne Trellis Files. You’ll also be able to access these files directly in key Vyne Trellis features like Secure Email, Digital Cases, and Attachments.
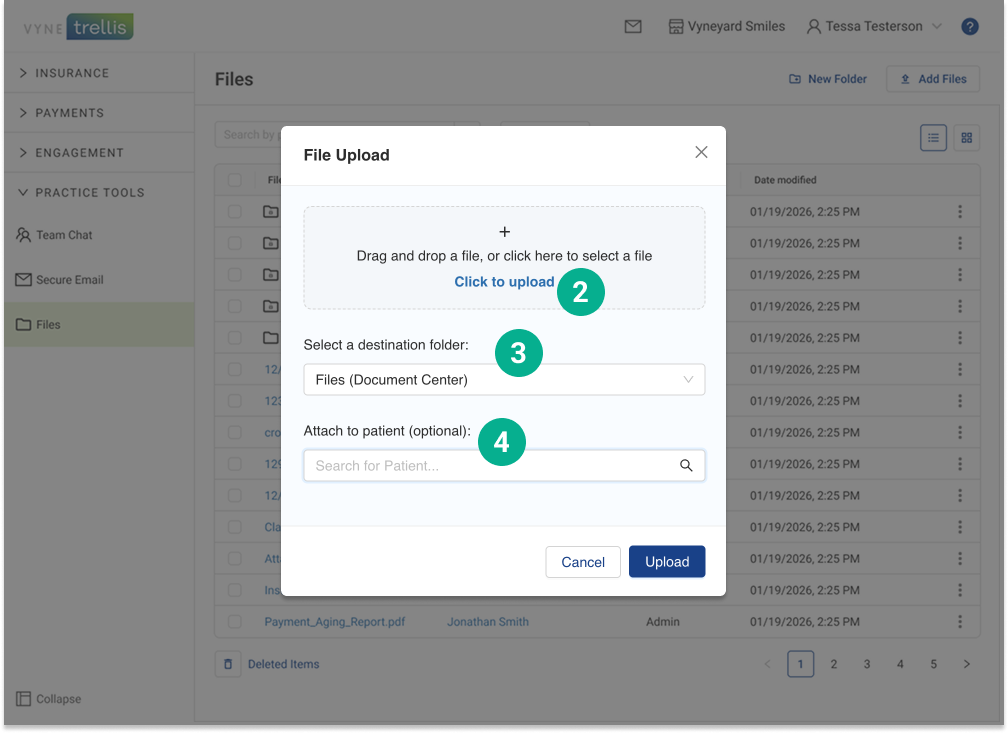
Uploading Local Files
1. Select the Add Files button
2. Drag and drop any documents you’d like to upload – or select the “Click to Upload” link to browse and select files. 3. Optional: Choose a folder destination for your files 4. Optional: Select a patient to associate with the uploaded files