The JETT File Uploader sends printed documents to Vyne Trellis Files, eliminating local storage or exports. Documents are instantly available in Vyne Trellis for claims attachments, secure email, and other workflows
Uploading from Your PMS to Vyne Trellis Files
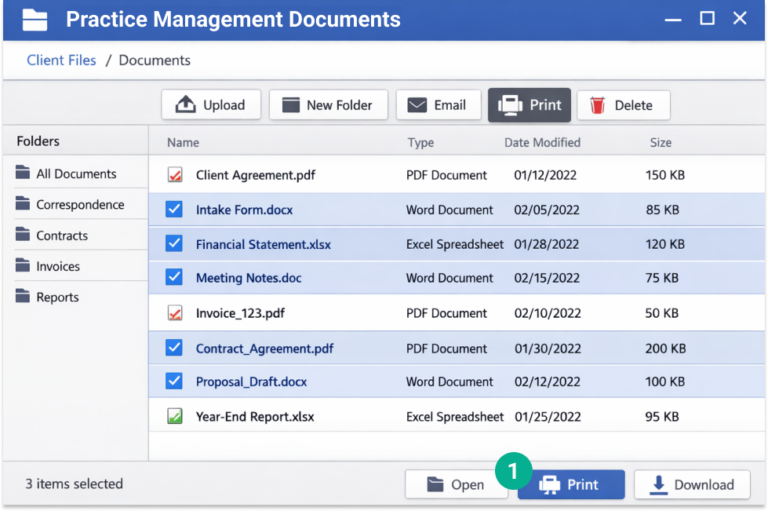
1. Select the files you’d like to send to Vyne Trellis and click Print.
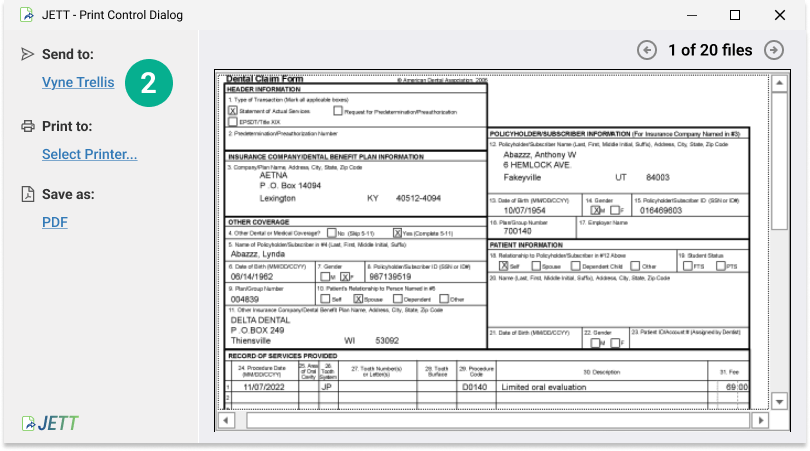
2. The JETT Print Control Dialog will launch. Click Send to: Vyne Trellis.
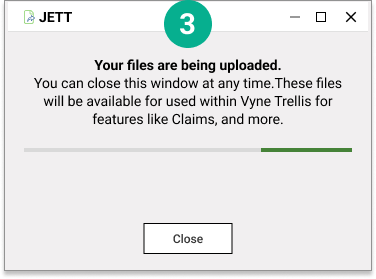
3. You’ll see a confirmation window that your files are being uploaded to Vyne Trellis. All documents printed with JETT are sent to the Files tab, ready to use. You’ll be able to access these files directly in key Vyne Trellis features like Secure Email, Digital Cases, and Attachments.
Attaching files in Vyne Trellis
All files uploaded via JETT are available in Vyne Trellis. To attach a file, navigate to the desired feature below:
Attach files to a Claim
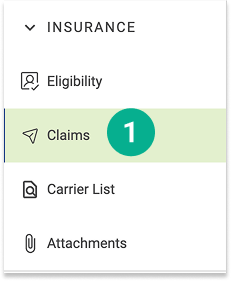
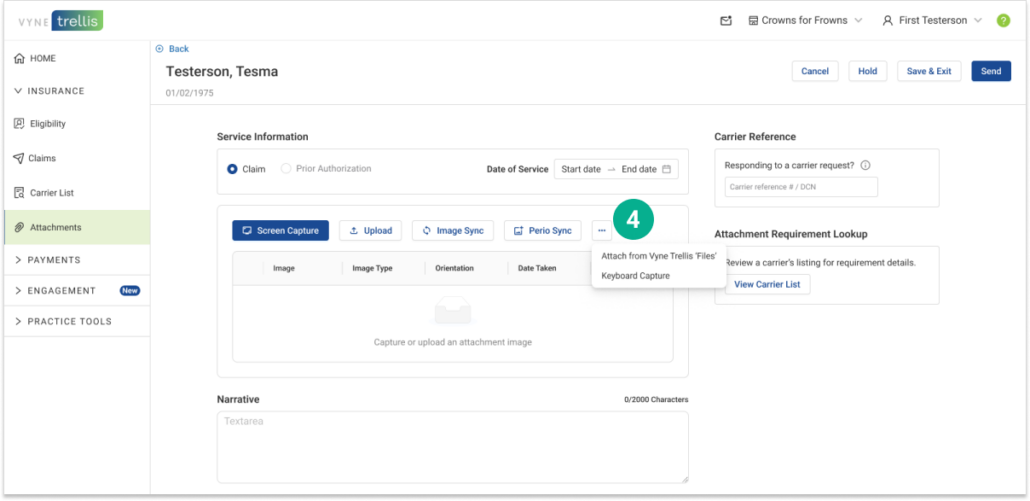
1. Expand the Insurance section and select Claims. Select the claim you’d like to add attachments to.
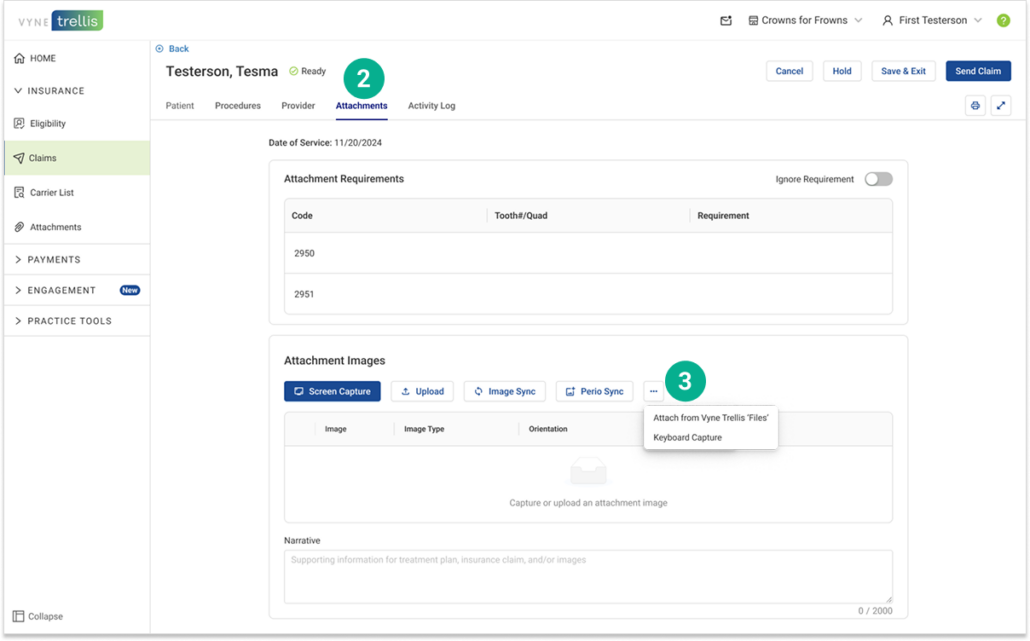
2. Click on the Attachments tab 3. Under Attachment Images, click the “…” menu and select Attach from Vyne Trellis ‘Files’
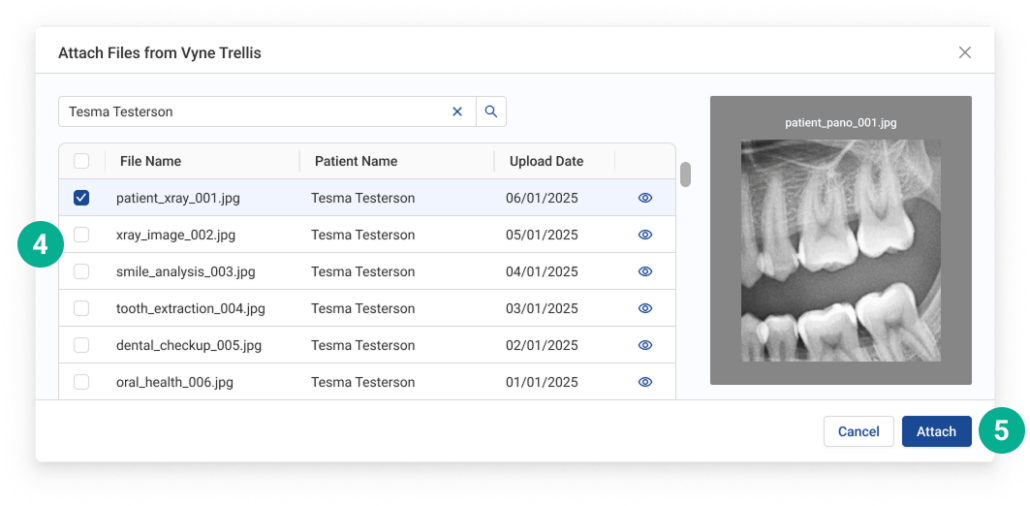
4. Browse and select the files you want to attach to the claim 5. Click the Attach button
Attach files in Standalone Attachments
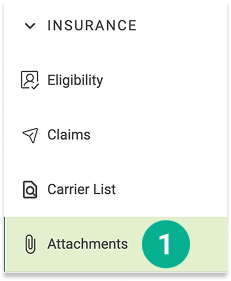
1. Expand the Insurance section and select Attachments.
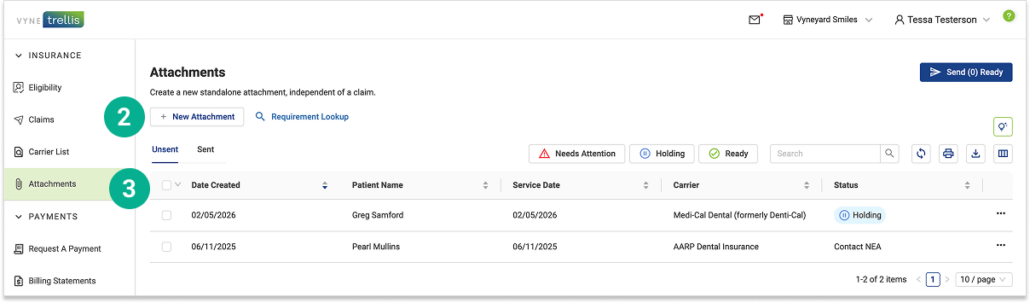
2. Click “+New Attachment” OR 3. Select an existing attachment to modify
4. Click the “…” menu and select Attach from Vyne Trellis ‘Files’
5. Browse and select the files you want to attach 6. Click the Attach button
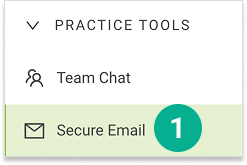
Attach files to a Secure Email
1. Select Secure Email
2. Click on Compose 3. To add attachments, click Attach Files. You can attach any files uploaded to Vyne Trellis Files – or select any local files to upload. 4. Once complete, click the send button.
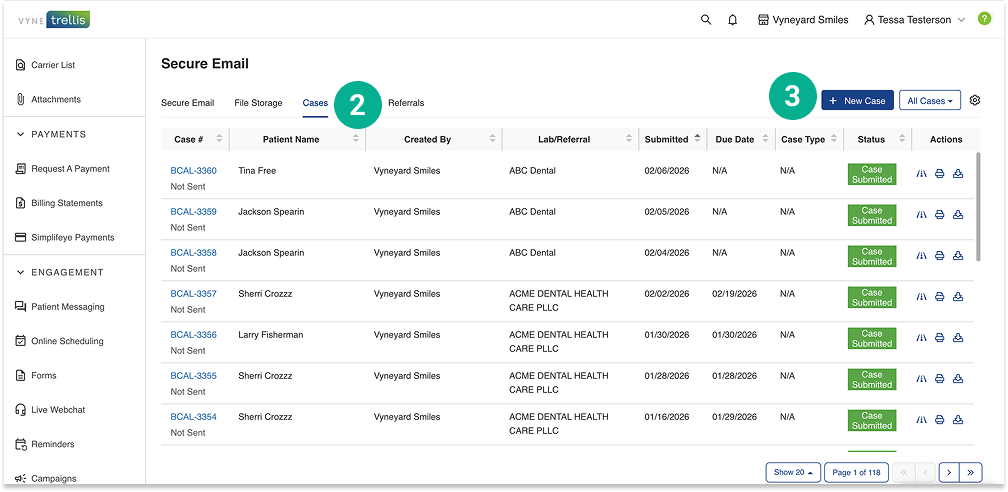
Attach files to a Digital Case
1. Select Secure Email
2. Click on the Cases tab 3. Select the New Case button
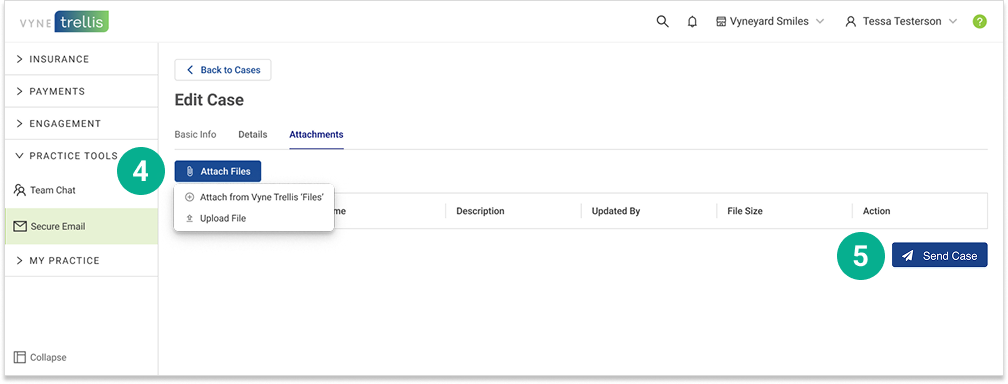
4. To add attachments, click Attach Files. You can attach any files uploaded to Vyne Trellis Files – or select any local files to upload. 5. Once all attachments are complete, click Send Case.
Attach Files from Trellis Files
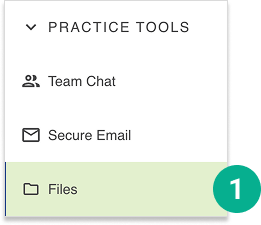
1. Open Vyne Trellis and expand the “Practice Tools” section. Select “Files”.
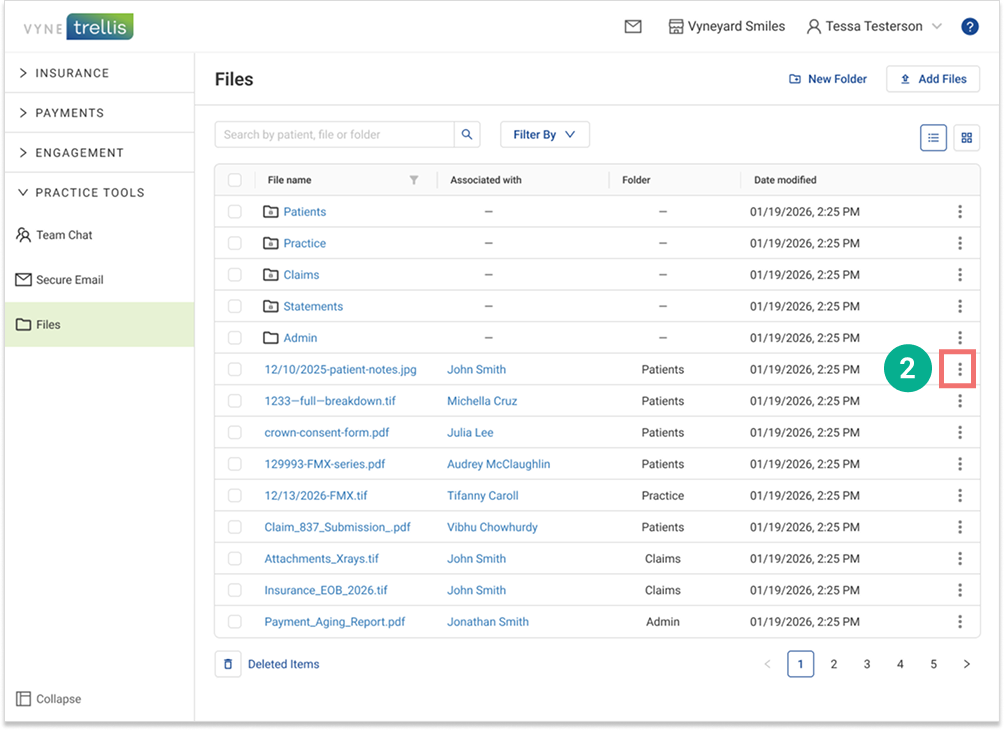
2. Locate the file you’d like to attach and click on the “three dot” menu icon
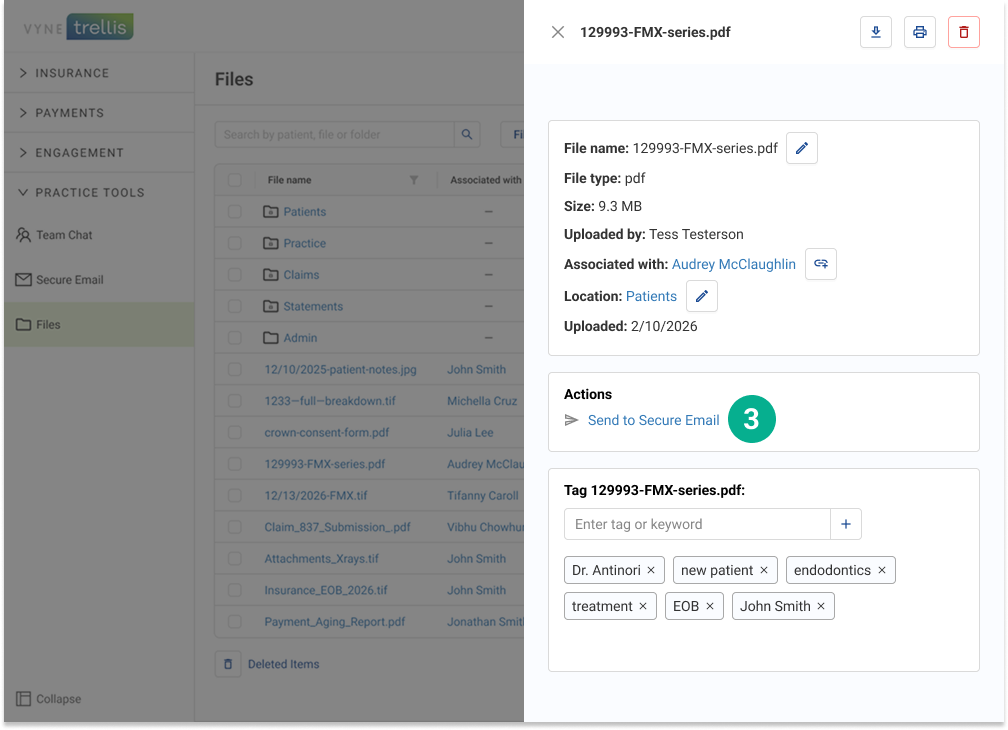
3. In the “Actions” section, click the feature you’d like to attach your file to. A new window will open, attaching the file within the appropriate workflow.