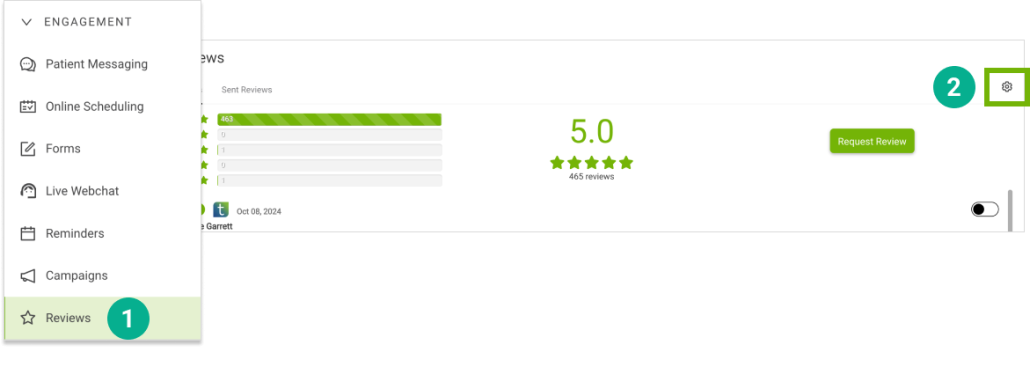
1. Open Trellis and expand the Engagement Section. Click on Reviews in the sidebar. 2. Select the Settings “gear” icon in the upper right.
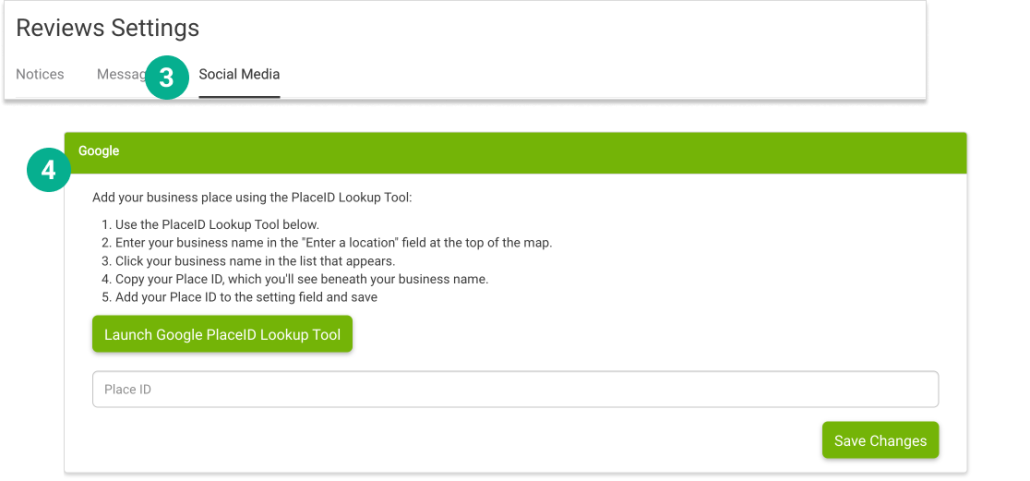
Set your Google place ID 3. Select the Social Media tab and scroll down to the Google section (4) and add your business place using the PlaceID Lookup Tool.
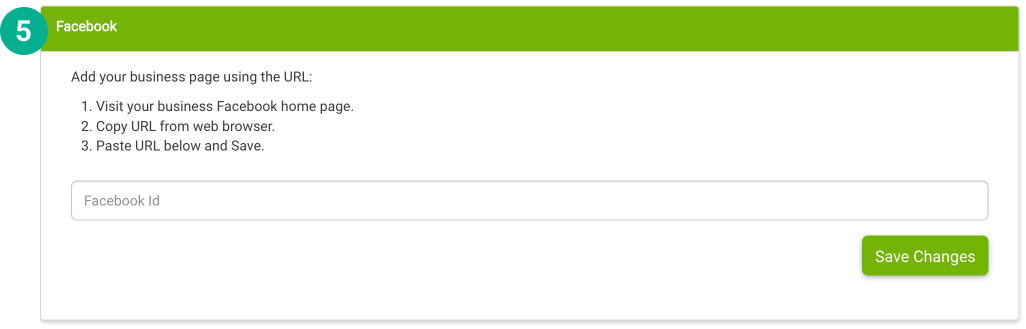
Set your Facebook URL 5. Scroll down to the Facebook section and add your business page using the URL.
STEP 2
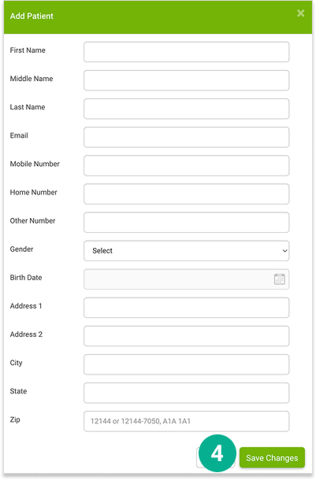
Add a New Patient
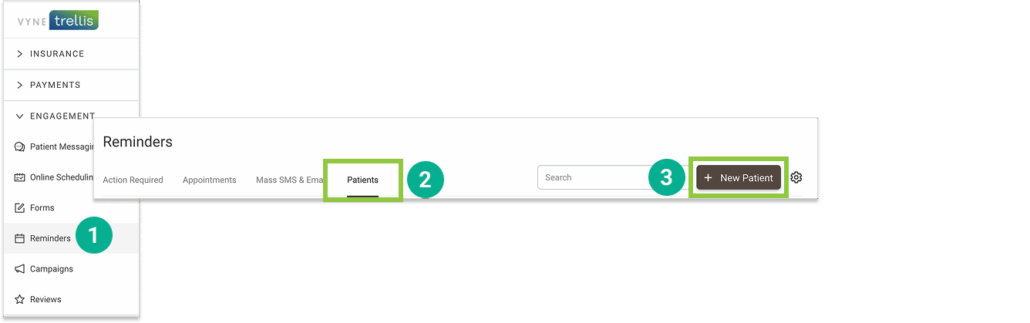
1. Open Trellis and expand the Engagement Section. Click on Reminders in the sidebar (this is where new patients can be added and shared with multiple engagement features). 2. Select the “Patients” tab 3. Select the “+ New Patient” button
4. Complete the patient’s information and select the “Save Changes” button.
STEP 3
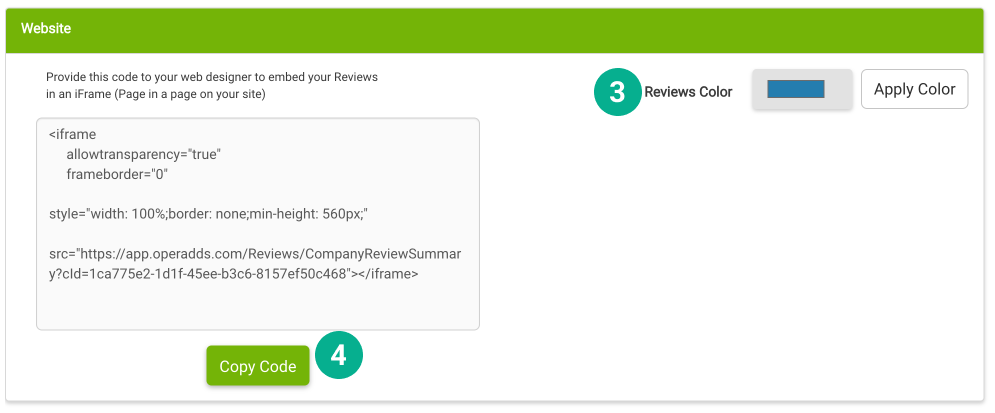
Add the Reviews widget to your website
1. Open Trellis and expand the Engagement Section. Click on Reviews in the sidebar. 2. Select the Settings “gear” icon in the upper right.
3. Under the Website section, adjust your Reviews Color to a color that matches your office’s palate. 4. Click Copy Code and provide this to your website designer to feature your Google and/or Facebook reviews!
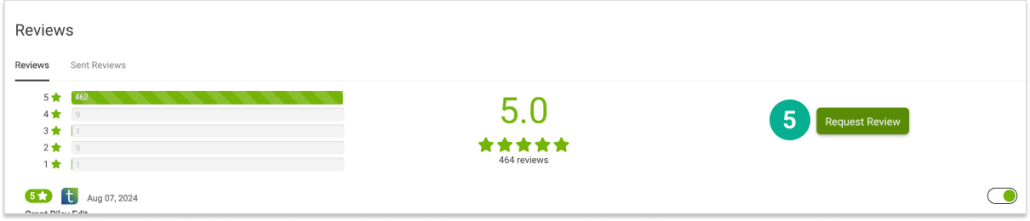
5. You can also manually send a request to a patient for a review by click on the Request Review button on the main Reviews page.
STEP 4
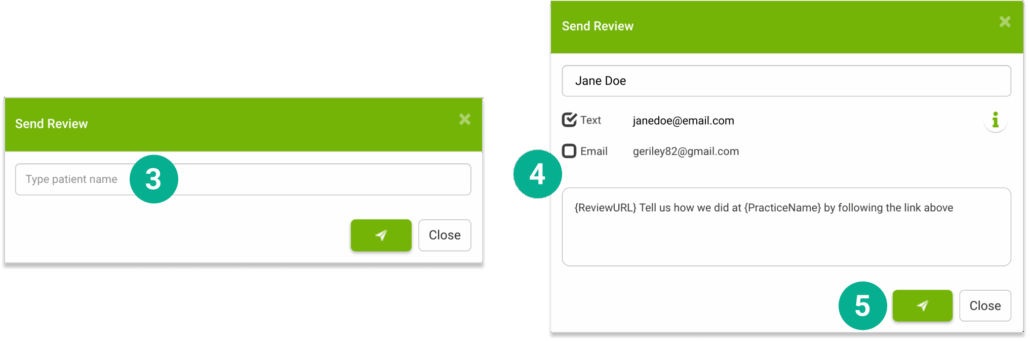
Send a Request for a Review
1. Click on “Reviews” in the sidebar 2. Select the “Request a Review” button
3. Start typing a patient’s name and select it from the list 4. Select whether you want to send the request by Text or Email 5. Click the Send button to send your Review request
STEP 5
Monitor your score in your dashboard
1. Select Reviews
2. Your Reviews tab lets you see all completed reviews – and allows you to select which reviews you’d like visible on your website
3. Your Sent Reviews tab lets you see all request that have been sent to patients request a review.