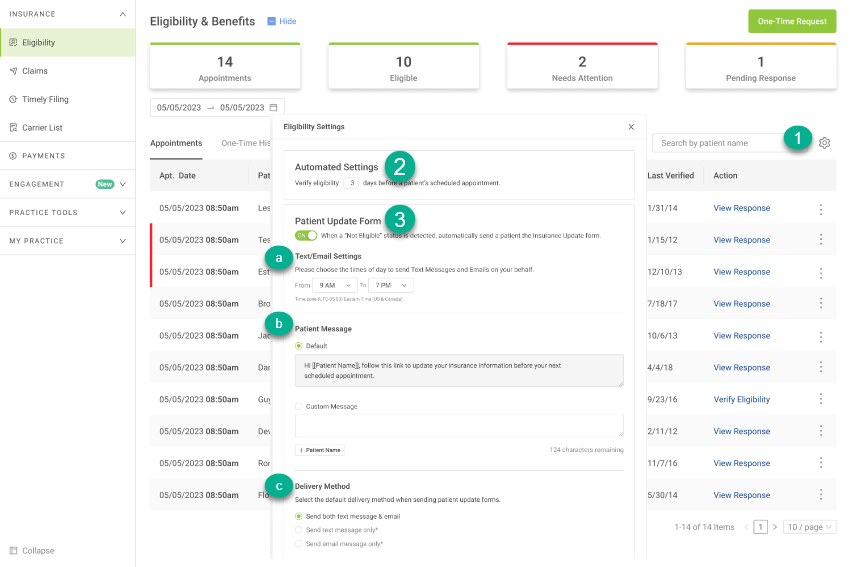
1. Click on the Settings wheel on the Eligibility page
2. Choose your Automated Settings to verify eligibility X days before a patient’s scheduled appointment
3. Select if you want the Patient Update Form ON when a “Not Eligible” status is detected which will automatically send the patient the Insurance Update Form
a) Choose the times of day to send a message b) Select Default or Custom Message c) Choose the Delivery Method
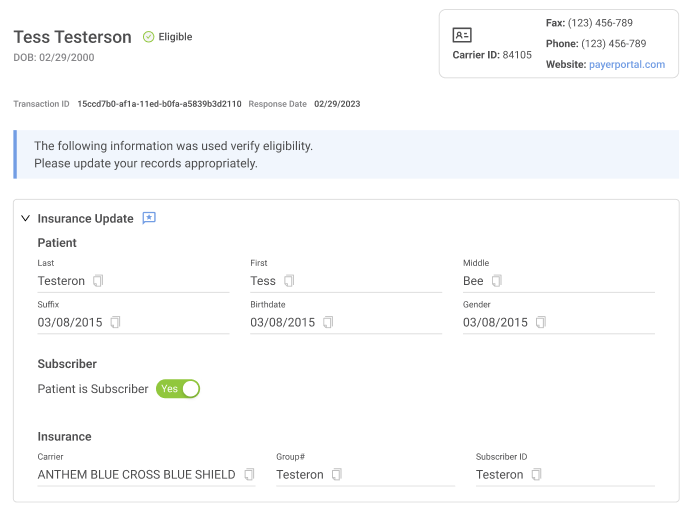
Insurance Update Form
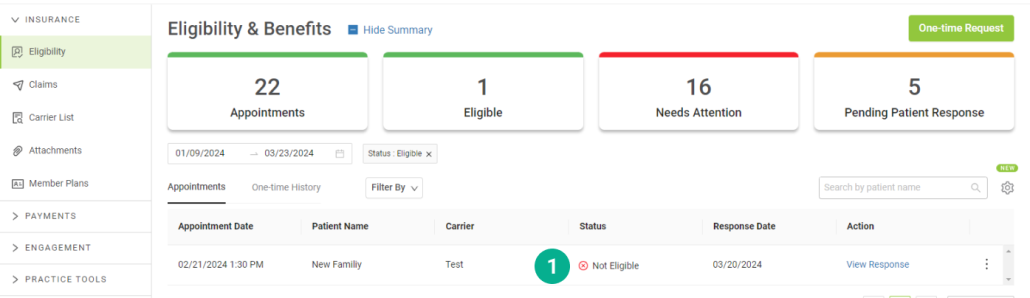
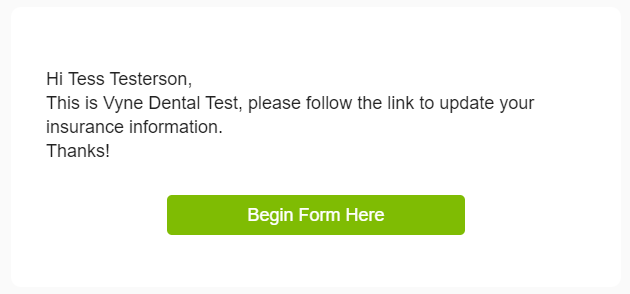
When you’ve selected the Patient Update Form setting to be ON, and a ‘Not Eligible” status is detected after auto-verification, Vyne Dental will automatically send your patient a text or email message on your behalf to retrieve updated insurance information and subsequently re-verify eligibility using the updated insurance information.
1. Eligibility is initially verified and a Not Eligible status is detected.
2. The patient receives a text/email (depending on your preference in Settings).
3. The status is updated to Pending Response in Vyne Trellis.
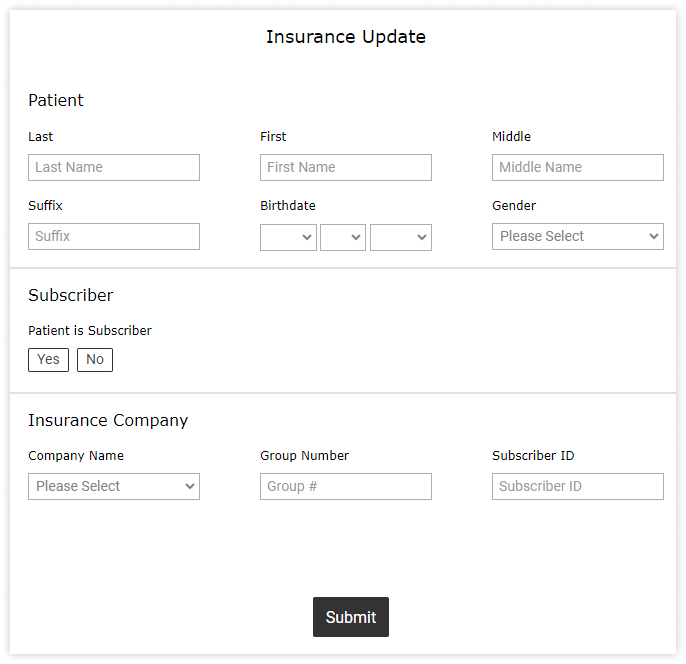
4. The patient fills out the form and clicks Submit.
5. Vyne automatically re-verifies eligibility with the updated information and provides a new response that includes the patients’ updated information.