Click here to update or install your plugin. The JETT plugin is required on all computers where users initiate sending statements, not on your practice server. By connecting the JETT Plugin, patient data will automatically flow into Vyne Trellis, eliminating manual entry.
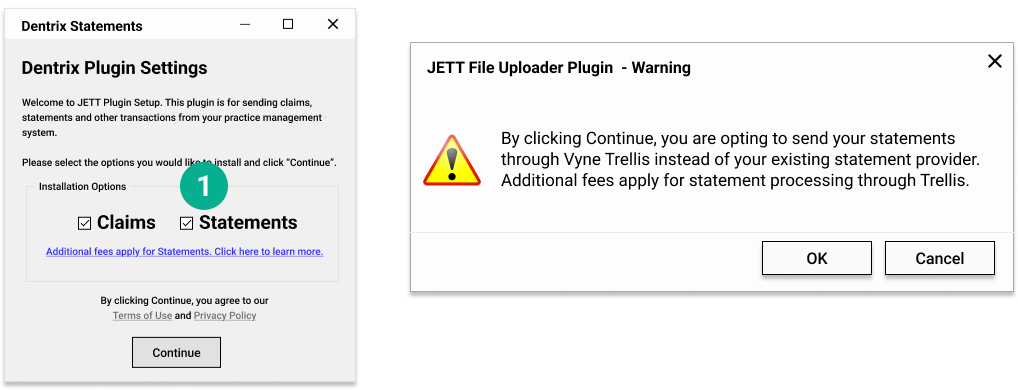
1. On the Dentrix Plugin Settings screen, under Installation Options, check Statements when prompted to opt in for Billing Statements.
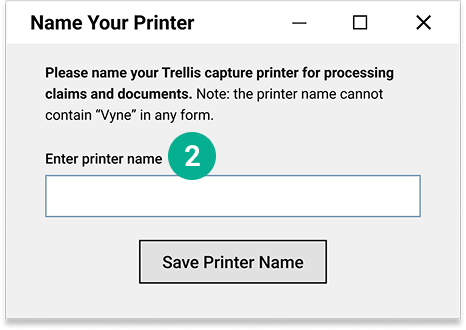
2. If this is a new install, you will be prompted to name your printer for processing billing statements after your update is complete. Note: the printer name cannot contain “Vyne” in any form.
STEP 2
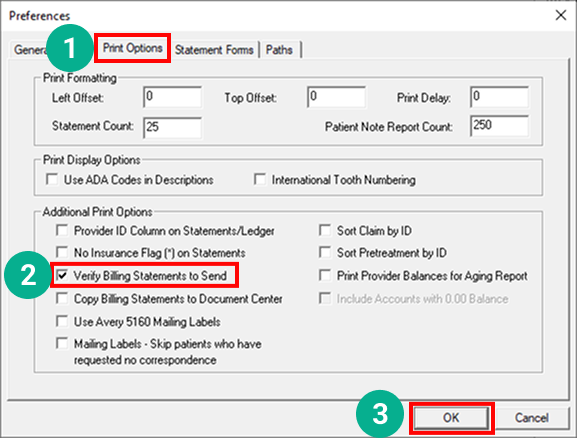
Enable Billing Statement Verification
This will allow you to check which statements are being considered by Dentrix prior to them being sent to Vyne Trellis. 1. From the Office Manager, select Maintenance > Practice Setup > Preferences. Click the Print Options tab. 2. Check the box next to Verify Billing Statements to Send. 3. Click OK.
STEP 3
Optional: Set up Chart Numbering
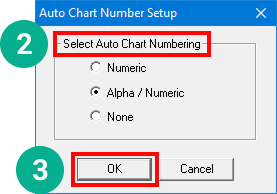
Chart numbers are required for proper statement generation. If you don’t currently have chart numbers set up in your practice management system, please follow these steps: 1. In the Office Manager, select Maintenance, → Practice Setup → Auto Chart Number Setup. 2. When the Auto Chart Number Setup dialog box appears, choose your preferred chart numbering option:
Numeric – Automatically generate a six-digit chart number for every new patient.
Alpha/Numeric – Automatically create a six-character chart number for each new patient, combining the first two letters of their last name with a unique four-digit identifier.
None – Choose this option if you prefer not to auto-generate chart numbers. With this setting, you’ll need to manually enter a chart number for each new patient in the Family File
3. Select OK to save
Important Note: Turning on Auto Chart Numbering will assign a chart number automatically only when a new family is made in Dentrix. It does not automatically generate chart numbers for existing patients.
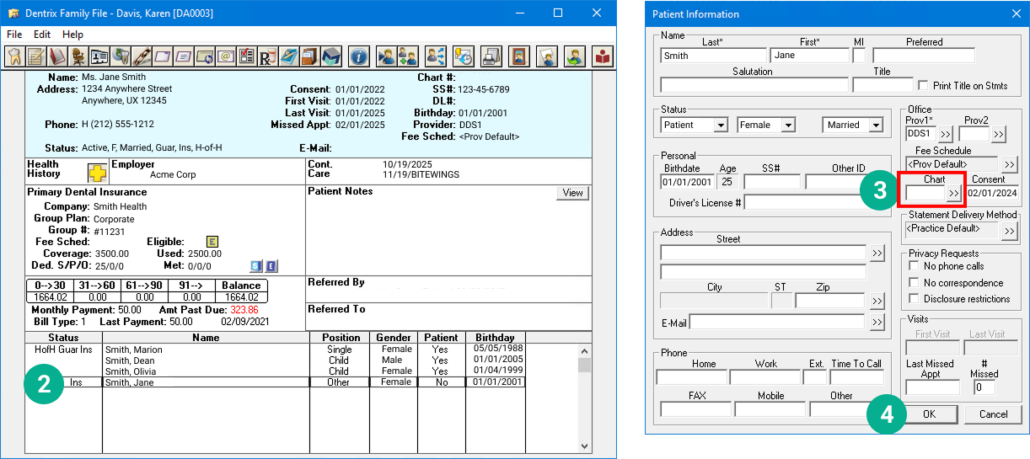
To add chart numbers for EXISTING patients: 1. Open your Office Manager and go to the patient’s record. 2. Open the patient’s Family File (the screen where the Chart field appears). 3. Find the “Chart” (Chart Number) field. Double-click it (or click into it so you can edit it).Type a chart number manually (any format your office prefers—just make sure it’s something you can keep consistent). 4. Click OK. If Dentrix shows an error that the chart number is already in use / not unique, enter a different number and save again.
STEP 4
Generate your statement list in Dentrix:
In Office Manager, go to Reports → Billing → Billing Statements.
Check or uncheck options to achieve the following settings:
Print Dental Insurance Estimate – ON
Print Agreed Payment – ON
Print Account Aging – ON
Due Date – Optional
Choose Statements: Batch
IMPORTANT: In the lower right, check “Save as Default”. This saves your settings for future statements.
Click OK
STEP 5
Manage your Billing Statements settings
Changes made to Statement Settings must be made before submitting statements. After saving, all updates will apply to future submitted statements.
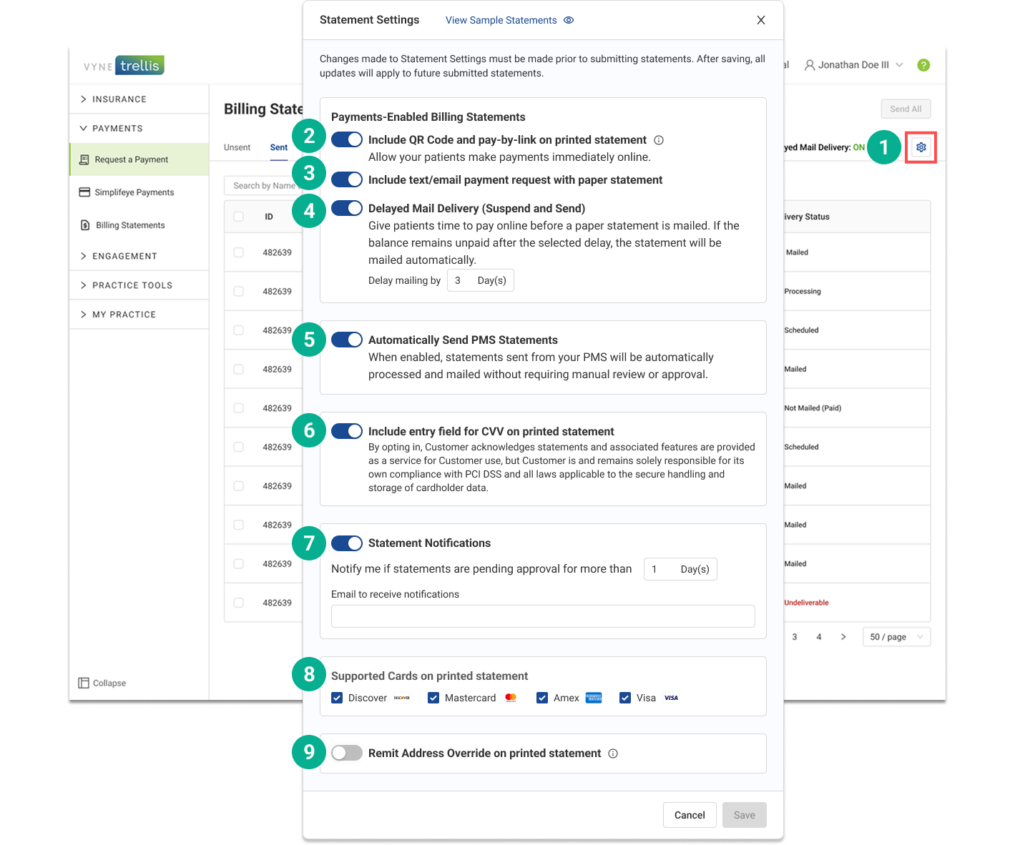
1. Click on the Settings icon on the Billing Statements Page.
Available settings:
2. Include a QR code and online payment link on printed statements allowing users the option immediately pay online (requires Vyne Trellis Payments) 3. Send a text/email payment request in addition to your paper statement 4. Ask patients to pay electronically before mailing a statement. Choose a delay of 1–7 days (default is 3 days). If the full balance isn’t paid within that timeframe the statement will automatically be mailed. 5. Automatically Send PMS Statements – statements sent from your PMS will be automatically processed and mailed without requiring manual review or approval. 6. Include the CVV field option on printed statements 7. Receive an email notification if unsent statements are pending approval for more than a time period that you set. 8. Select/De-select Card Types accepted by your office 9. Override the address that is printed and mailed on your billing statements
Click Save to apply changes to future submitted patient billing statements.
Sending Billing Statements to Vyne Trellis
(for JETT Plugin versions 25.11 or higher)
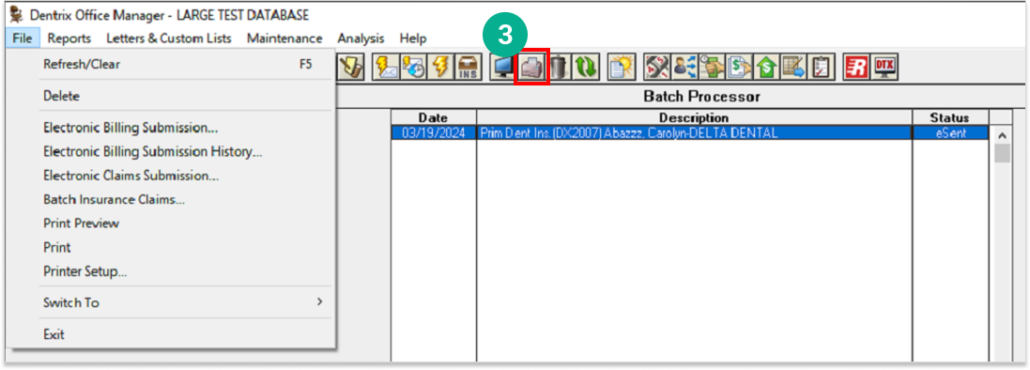
1. To locate and send Billing Statements, Open the Office Manager in Dentrix by clicking on the Brown Chair Icon:
2. Highlight the statements you want to send to Vyne.
3. Click the Printer Icon (or select File > Print).
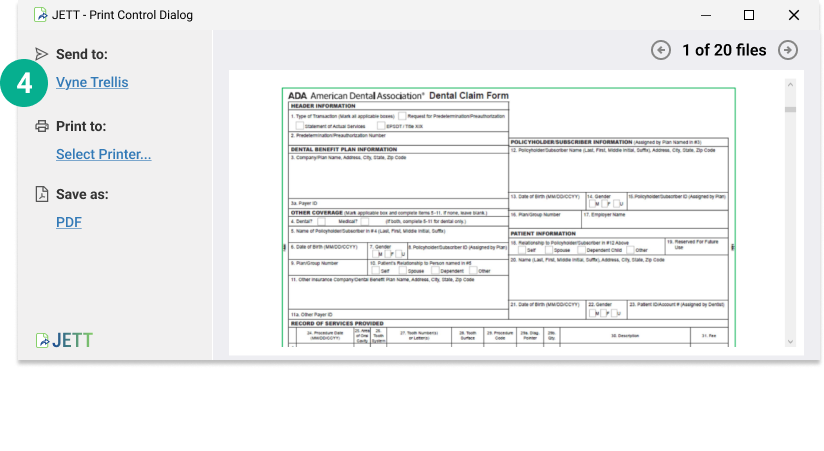
4. The JETT Print Control Dialog will open. Click Send to: Vyne Trellis.
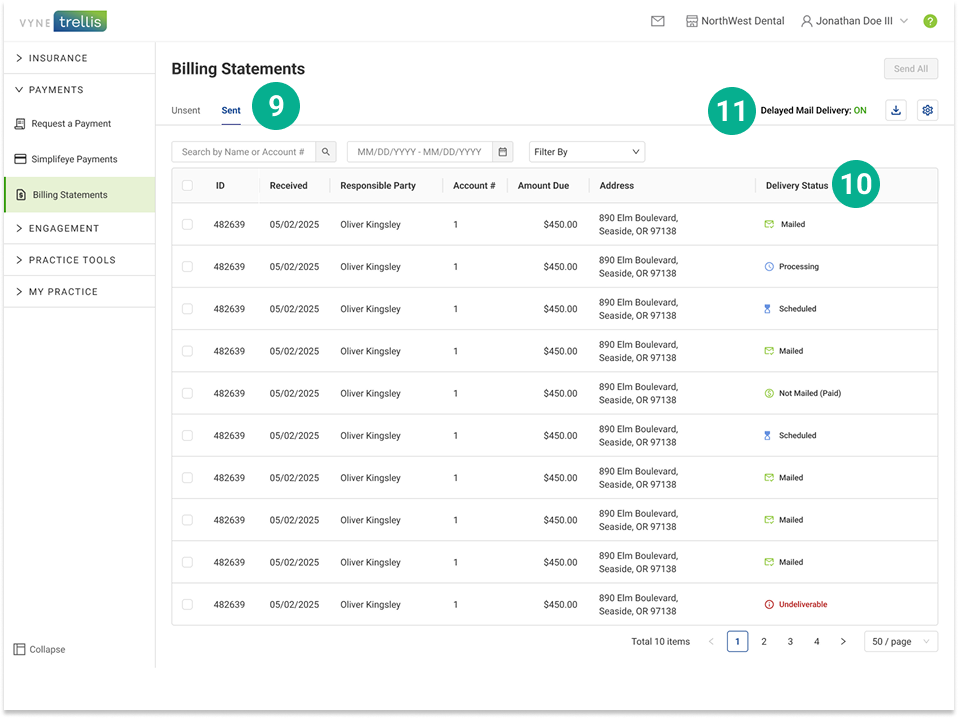
5. Once your statements are transmitted, Vyne Trellis will launch to the Billing Statements tab. By default, your statements will appear in the “Unsent” tab. NOTE: If you have enabled the “Automatically Send PMS Statements” setting, statements sent from your PMS will be automatically processed and mailed without requiring manual review or approval. 6. If you have Unsent Billing Statements in your queue, select the statements you want to send 7. Click the “Approve & Send” button to send your selected Statements 8. All sent Billing Statements will appear in the Sent tab
9. Your Sent tab gives you a detailed status of all sent billing statements 10. The Delivery Status column lets you know at what stage of the process your billing statements are in. If you have enabled Delayed Mail Delivery, you’ll also see what statements have been paid electronically (saving the cost of mailing). 11. Delayed Mail Delivery ON/OFF indicates whether Delayed Mail Delivery is enabled. When turned on, patients have the number of days you select (1–7 days; default 3 days) to pay electronically before a statement is mailed.
Provide Patients With an Easier Way to Pay From Their Billing Statement
Bring together billing statements with payment options such as QR codes and pay-by-links to pay online.
Integrate Billing Statements & Payments – 4 mins
Accelerate Your Payments Now! Start accepting online payments from your Billing Statements to see faster payment resolution. Enhance convenience for your patients and efficiency for your practice by providing easy, real-time payment options.
Getting Started is easy:
Enroll for Vyne Trellis Payments
Enable online payments in your Billing Statement settings