Submit your Statements from Eaglesoft
Click here to view Billing Statement Pricing.
Submitting your Statements from Eaglesoft – 6 mins
STEP 1
Install or Update Vyne Dental Plugin to the most recent version
By connecting Vyne Dental plugin, patient data will automatically flow into Vyne Trellis, eliminating manual entry.
Note: Vyne Dental Plugin is only required for computers sending claims or billing statements.
*Choose Claims and Statements in Installation Options when prompted to opt in for Billing Statements
STEP 2
Configure your Electronic Statements eService Account
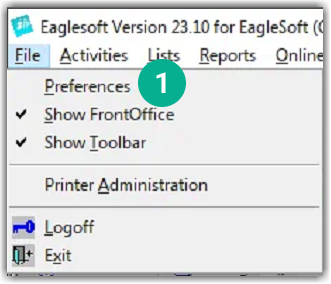
1. Click File & Preferences
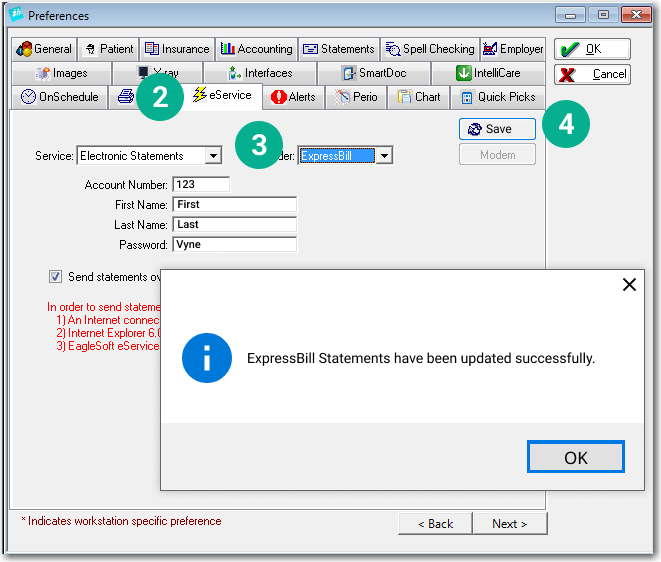
2. Select the eService Tab and choose Service: Electronic Statements from the Service Dropdown
3. Update the Account Number and Password to ‘Vyne’
4. Click Save
STEP 3
Send your Statements from Eaglesoft
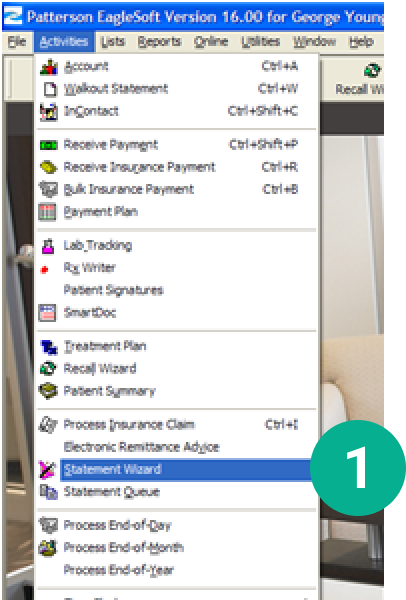
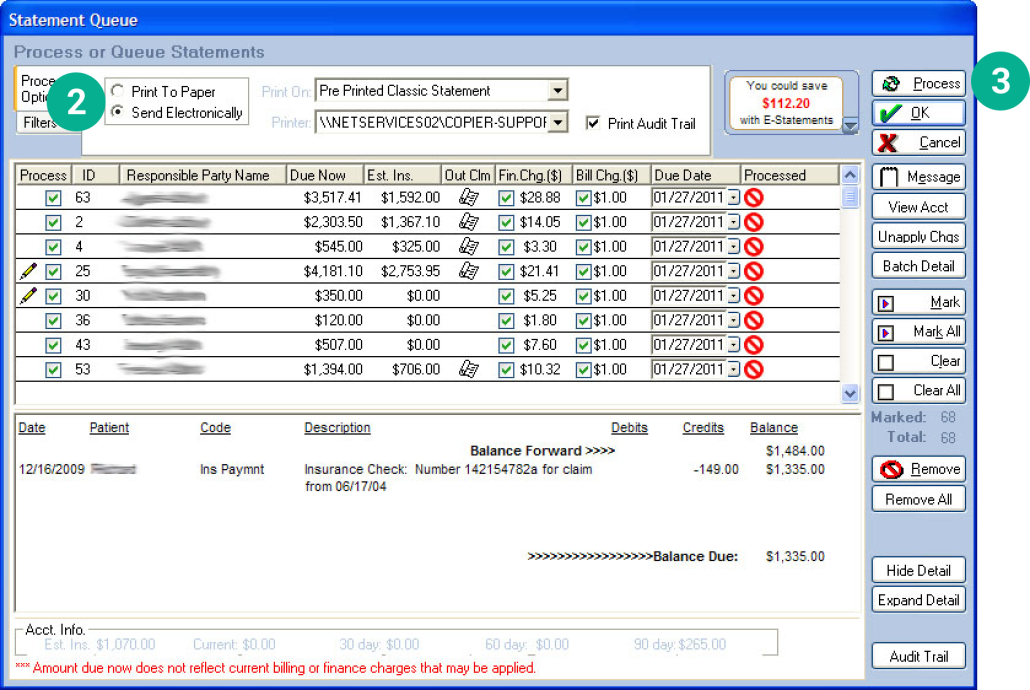
1. Access the Statement Queue through the Statement Wizard or via Activities > Statement Queue
2. Checkmark the Statements you want to send, choose Send Electronically
3. Click Process. Your Billing Statements will then be sent for printing/mailing
For more details on the Statement Wizard, visit the Eaglesoft article.
STEP 4
Open Vyne Trellis and click on Payments in the left sidebar
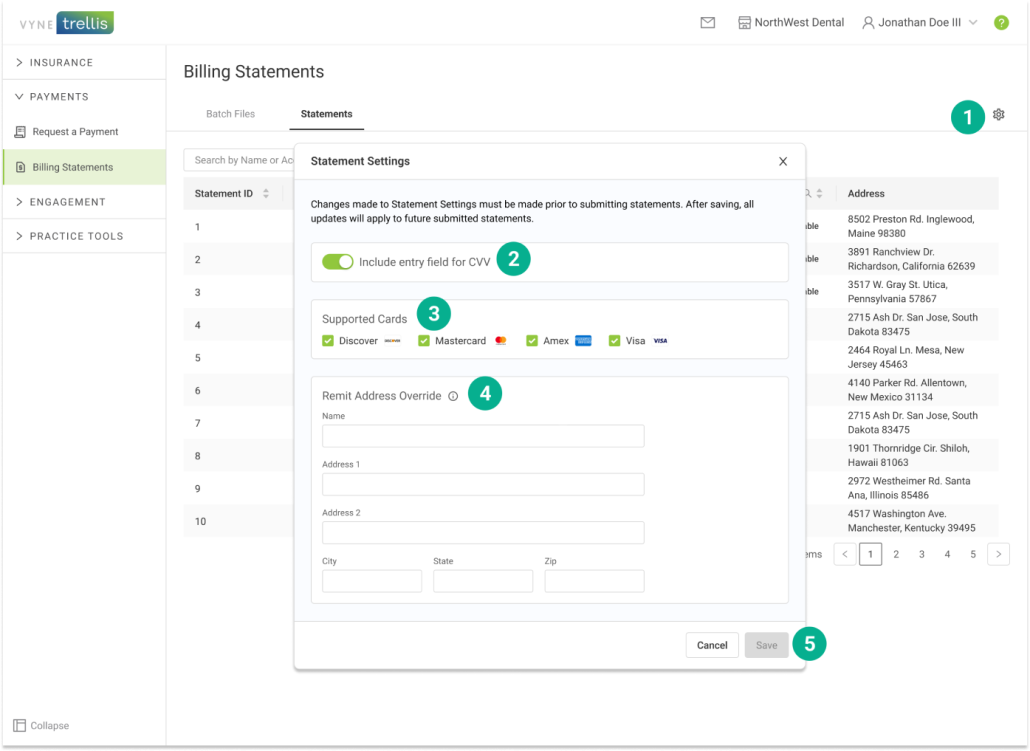
Click on Billing Statements (1) to view all current Statement and Files.

STEP 5
Manage your Billing Statements settings
Changes made to Statement Settings must be made before submitting statements. After saving, all updates will apply to future submitted statements.
1. Click on the Settings wheel on the Billing Statements
Setting available:
2. Include the CVV field option on printed statements
3. De-select/Select Card Types accepted by your office
4. Override the address that is printed and mailed on your billing statements
5. Click Save to apply changes to future submitted patient billing statements.
