
Sending Claims from Eaglesoft to Vyne Trellis
STEP 1
Install the Claims Plugin On Your Workstation
Start transferring Claims from your Practice Management System to Vyne Trellis by installing Claims Plugin on your workstation.
Note: Claims Plugin is only required for computers sending claims.
STEP 2
Start Sending Your Claims
Follow these steps to start sending your claims today
Option 1- For those who prefer to send at time of walk-out.
1. Choose Print Now to individually send claims
2. Ensure that the Insurance Form in Eaglesoft is set to Vyne Plugin
3. Click OK
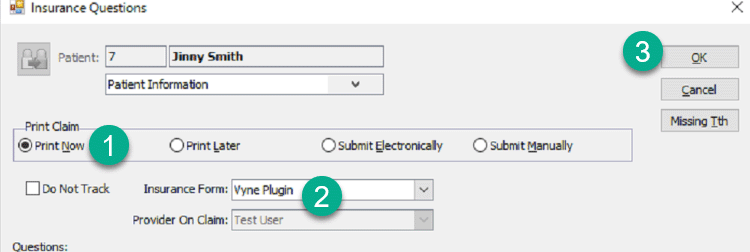
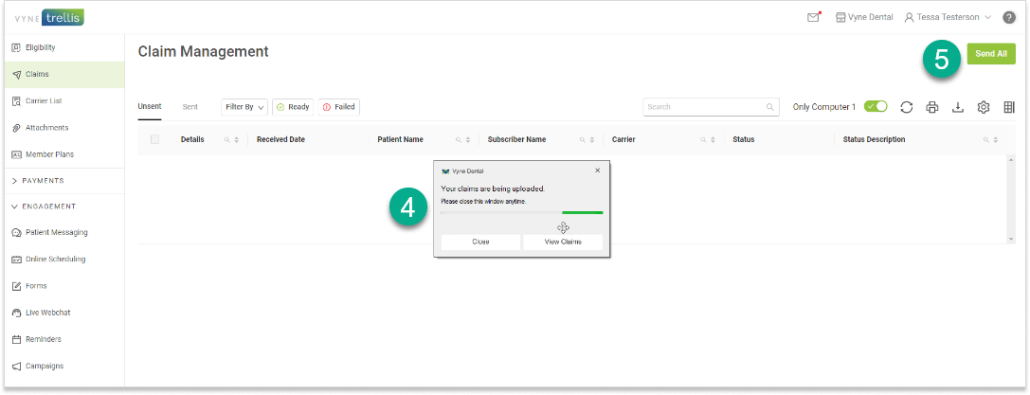
The individual claim will be uploaded to Vyne Trellis.
Don’t forget to click Send All in the upper right corner within Vyne Trellis, this is the final step to getting your claims sent to insurance!
Option 2 - For those who prefer to send in batch.
Choose Print Later on the Change Answers window. Ensure that the Insurance Form is set to Vyne Pluginand click OK.

1. When you are ready to transfer the batch of claims to Vyne Trellis, click on the Claims icon.

2. Ensure that the claims you want to send have the Vyne Dental or Print RES form in the Form Name column of the Process Insurance Claims window. Follow these instructions to setting your default insurance form.
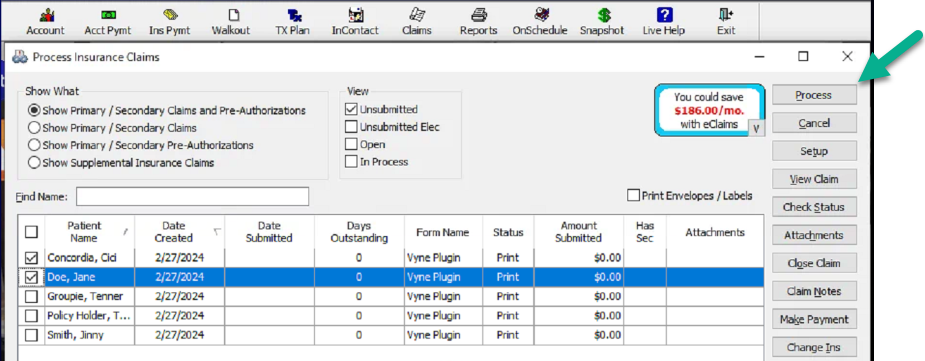
3. Mark the claims you want to send to Vyne Dental.
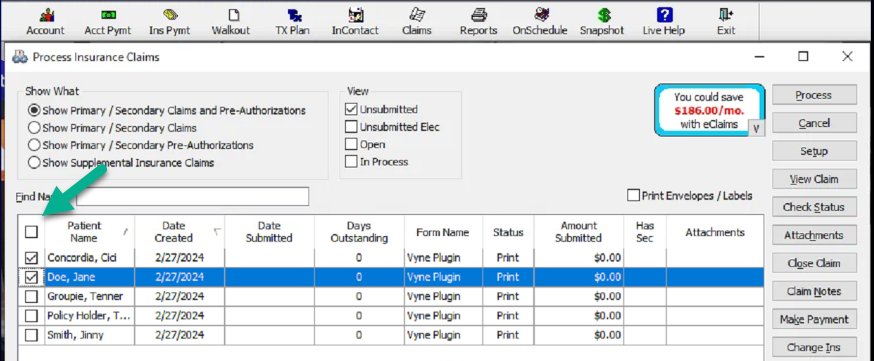
4. Click Process in the Process Insurance Claims window.
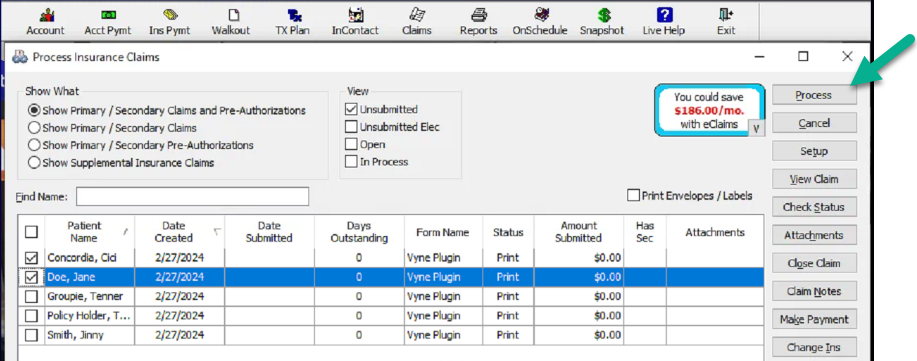
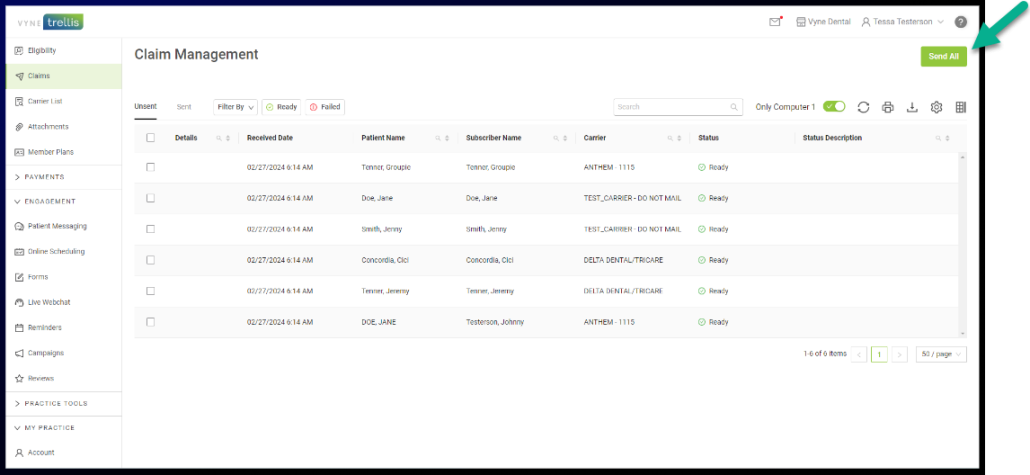
5. Your claims are now available in Vyne Trellis for easy and intuitive claims management. You can find them under the Unsent Claims tab.
Don’t forget to click Send All in the upper right corner within Vyne Trellis, this is the final step to getting your claims sent to insurance!
How do I track my claims after I send them to insurance?
You can track your claim status in Vyne Trellis.
After clicking Send or Send All to process your claims in Vyne Trellis, they will show up in the Sent tab of Vyne Trellis. Here you can track claims to see if they were accepted or rejected by insurance.
Submitting Claims from Eaglesoft to Vyne Trellis – 4 mins