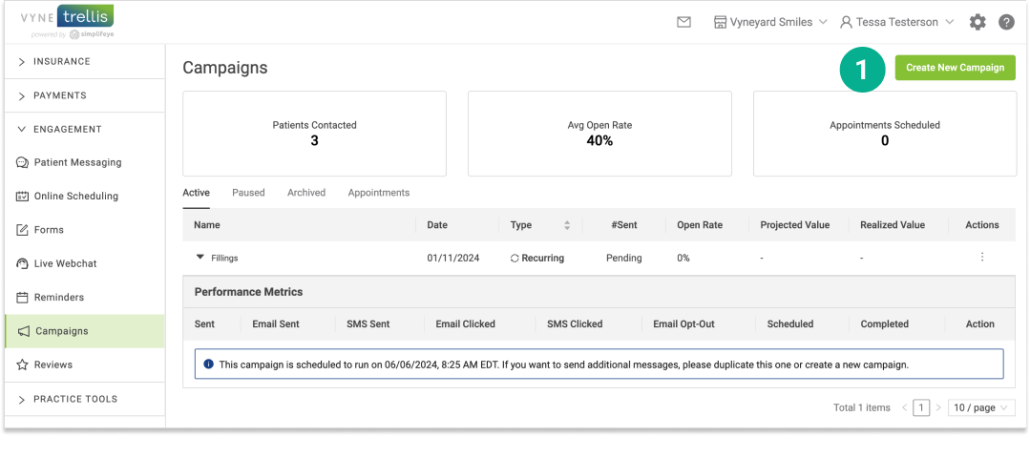
Open Vyne Trellis and click on “Campaigns” in the left sidebar
1. Open Vyne Trellis and click on Campaigns in the left sidebar. In the top right corner, click on the ”Create New Campaign” button.
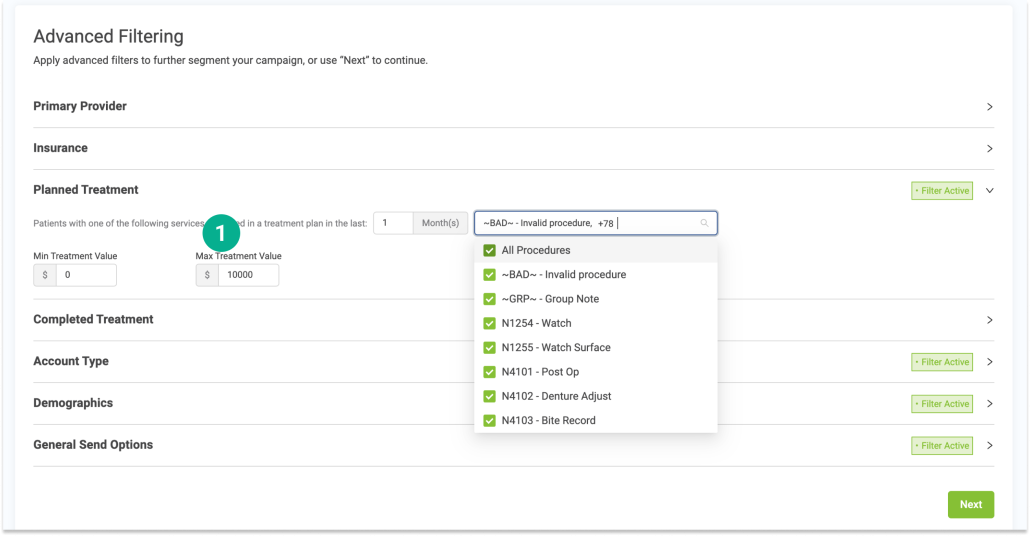
STEP 2
Scroll down to the Advanced Filtering section and click on the “Planned Treatment” row to expand.
1. Select your preferences, including recency of Treatment plan, procedures, and minimum/maximum treatment value. You can also select any other Advanced filters to further customize your campaign. When finished, click “Next” to continue.
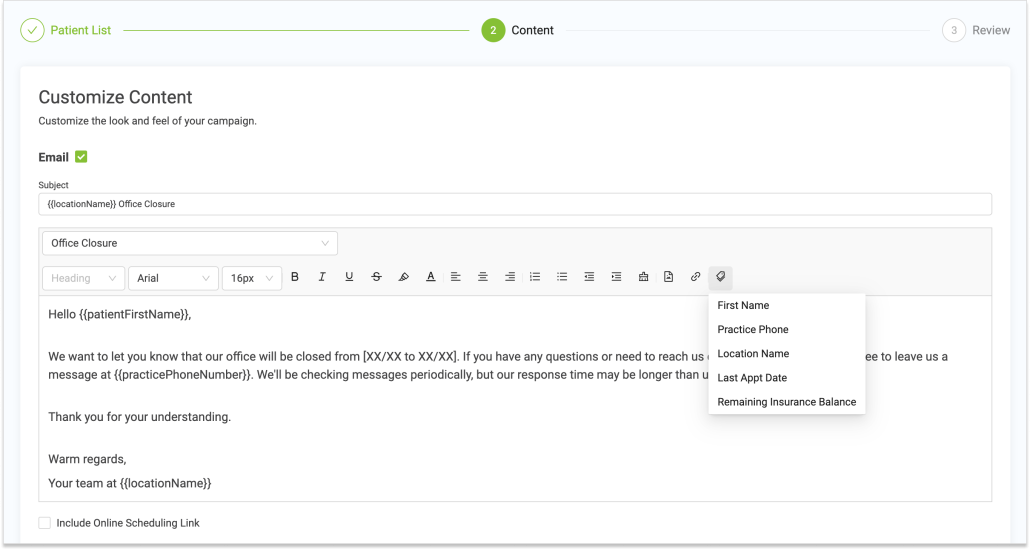
STEP 3
Customize your email or SMS content to be sent to your Patient List
Select which method of communication, Email, SMS or both, you would like to use to communicate with your patient list. For email you can either enter in a custom subject line and body content – or select a template to use or modify
For a custom email: 1. Enter a subject line
2. Enter the content for the body of your email. You can format the content by font, size, and appearance. You can also use advanced features like merge tags to dynamically include personalized information.
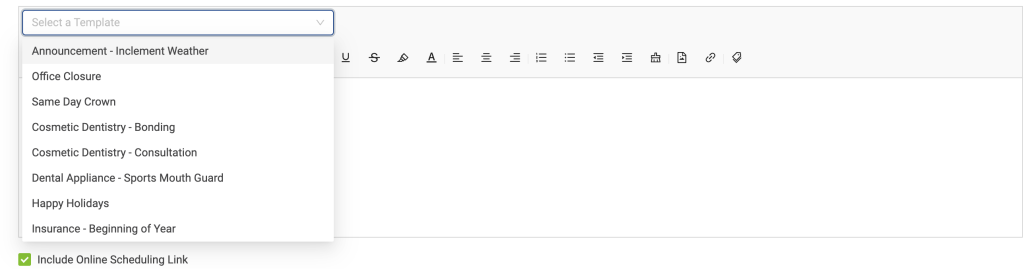
Create an email from a template:
Select any of the available templates from the menu. Once loaded, you can easily modify the template content and tailor it to your needs.
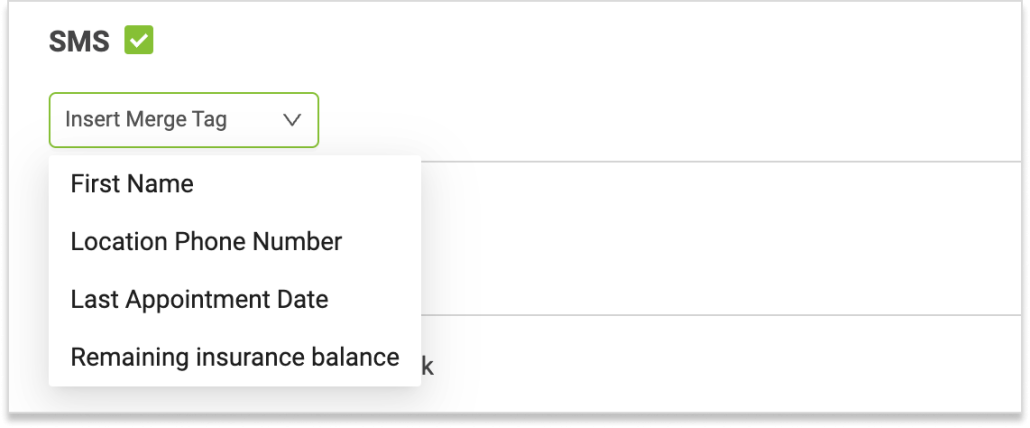
For SMS:
Enter the SMS message you’d like your patients to receive. You can also insert custom merge tags to personalize the message to display patient first name, practice phone number, patient’s last appointment date, and remaining insurance balance. Click “Next” to continue.
STEP 4
Review and Send your Campaign
1. Review the details of your campaign and ensure the information is correct. You can easily edit email/sms content or your patient list from this screen. If you wish to add new patients to this campaign after its creation, and as they qualify for your criteria, check “Add patients as they qualify.”
2. Schedule your campaign delivery. You can choose to send your campaign immediately or schedule it for a later date. For campaigns with Planned Treatment, you can establish start and end dates, how often, and at what time of the day you’d like your campaign to contact patients.
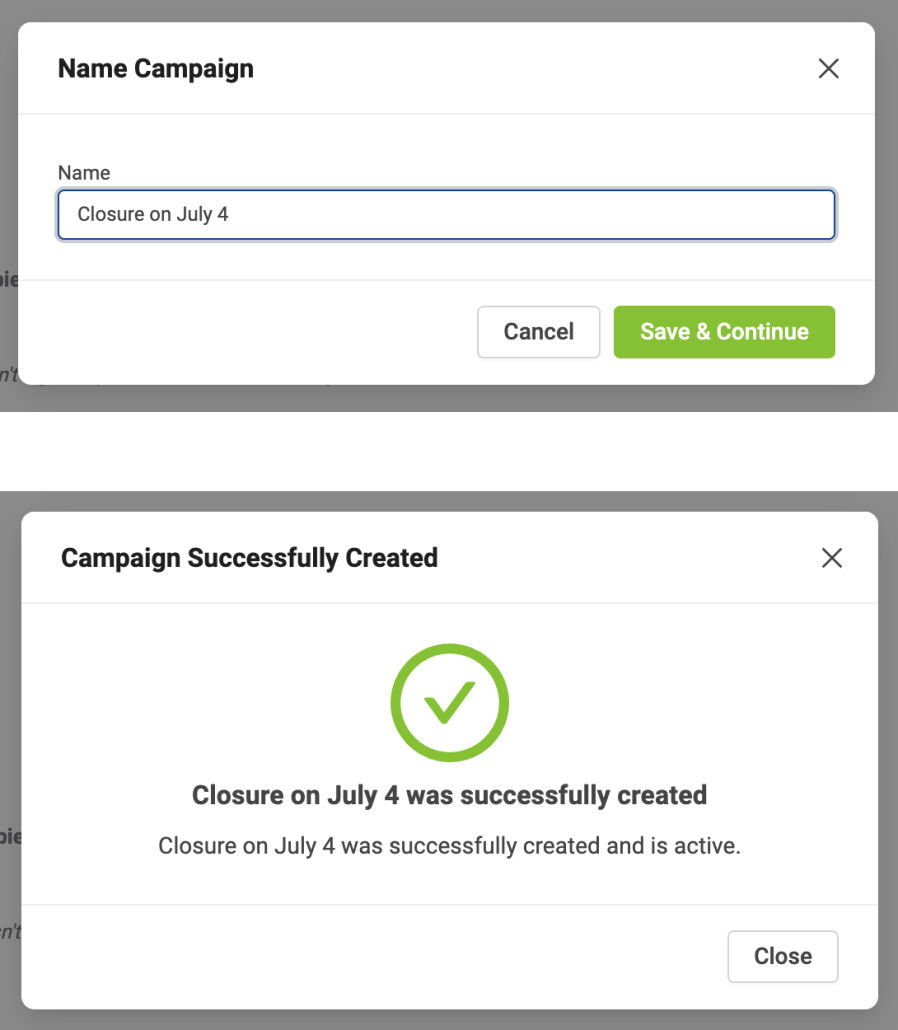
3. To complete your campaign, please give it a unique name. Click Save & Continue. You’ll receive a confirmation that your campaign is created and active.